
Using MidVision RapidDeploy to install, configure and deploy IBM WebSphere Liberty Profile
Prerequisites
You will need the following to perform this task
- An SSH enabled Linux server either on-prem or using a cloud provider such as Amazon AWS. You will need the (preferably root) connection details such as IP address, SSH port (default 22), username, password (or key/pem file).
- An running instance of RapidDeploy with the 'WebSphere Liberty Profile' plugin installed.
- An ear/war file to deploy to Liberty Profile
- The Liberty Profile binary package (if installing the binary using this process). The default IBM package name is [wlp-runtime-8.5.5.5.jar]. You can download the package from the IBM download page.
What we will cover in this article
In this article we will follow a step-by-step path to:
- Create a target server (node) definition in RapidDeploy which will define the required parameters to perform a deployment to this node using SSH.
- Create a target WebSphere Liberty Profile environment definition in RapidDeploy
- Create a binary install and deployment project definition in RapidDeploy with the tasks required to install IBM WebSphere Liberty Profile binaries, create a server, deploy a war file and finally start the server
- Create a deployment package to collect together the configuration and binaries to perform the above tasks
- Run a deployment which will provision Liberty Profile binaries, create a server, deploy the war file to this server and start the server
Create a server definition in RapidDeploy
- Log into the RapidDeploy server.
- Select Resources > Targets > Servers from the side menu. Click the 'Add Server Wizard' in the top right hand corner.
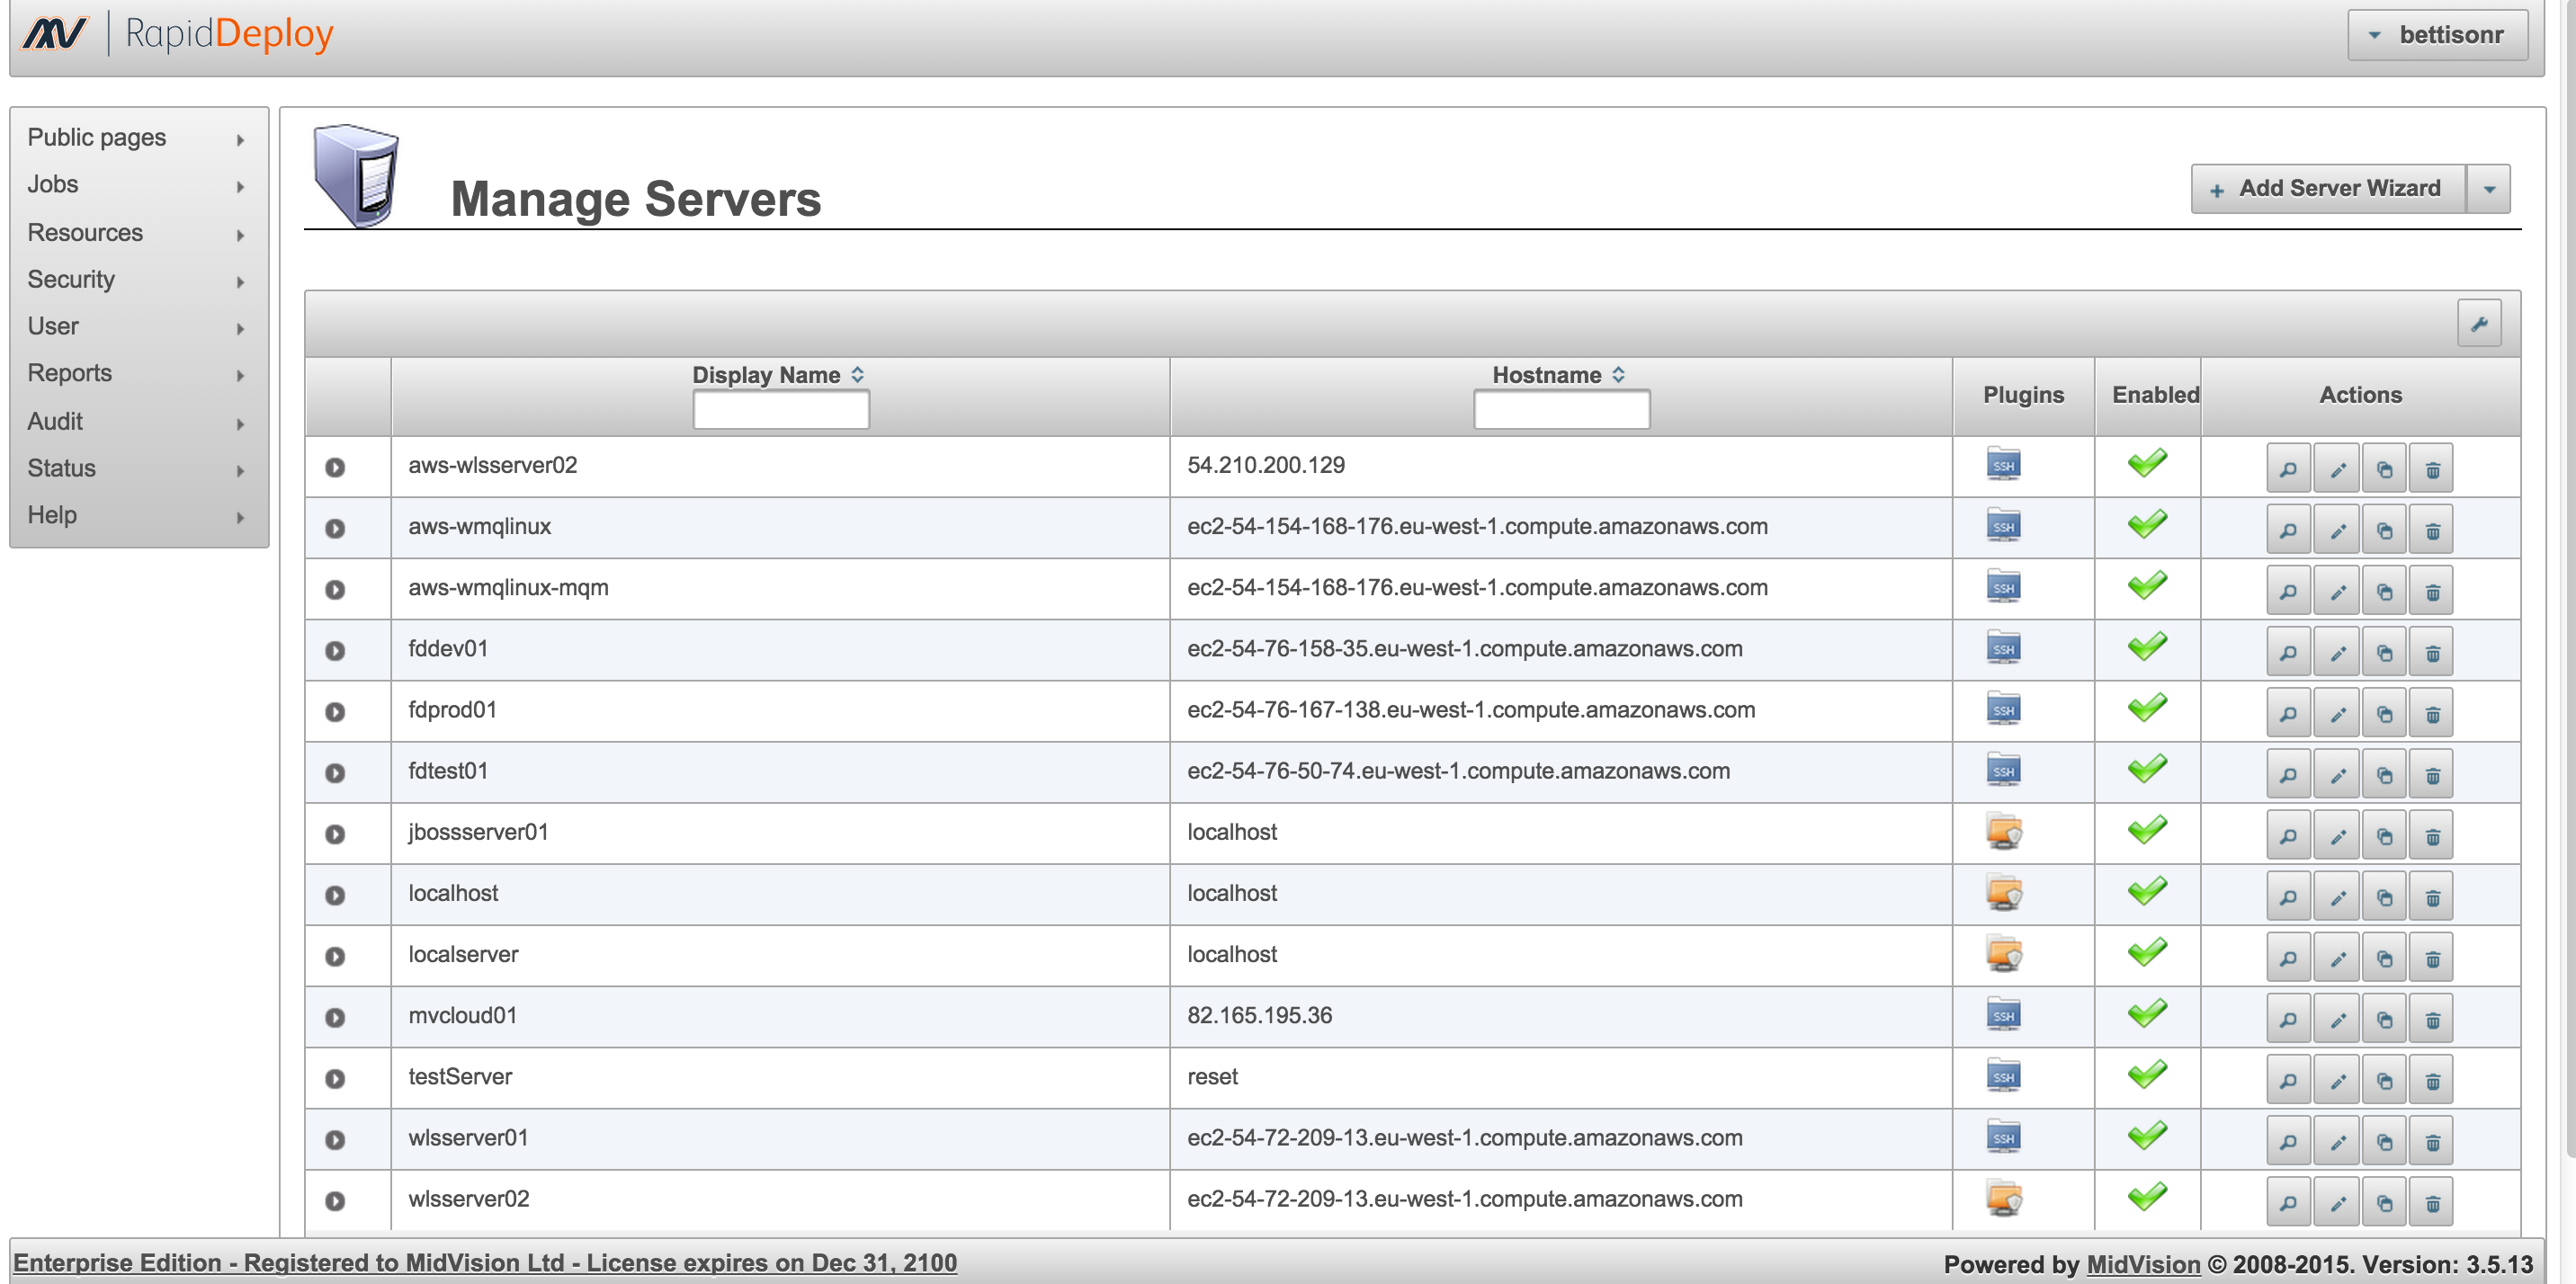
Server List View - On the 'General' tab, fill in a name [WLPServer], an IP address [as recorded earlier], a remote build store (existing filesystem on the remote server) where files will be copied to [/tmp] and set the operating system to [Linux].
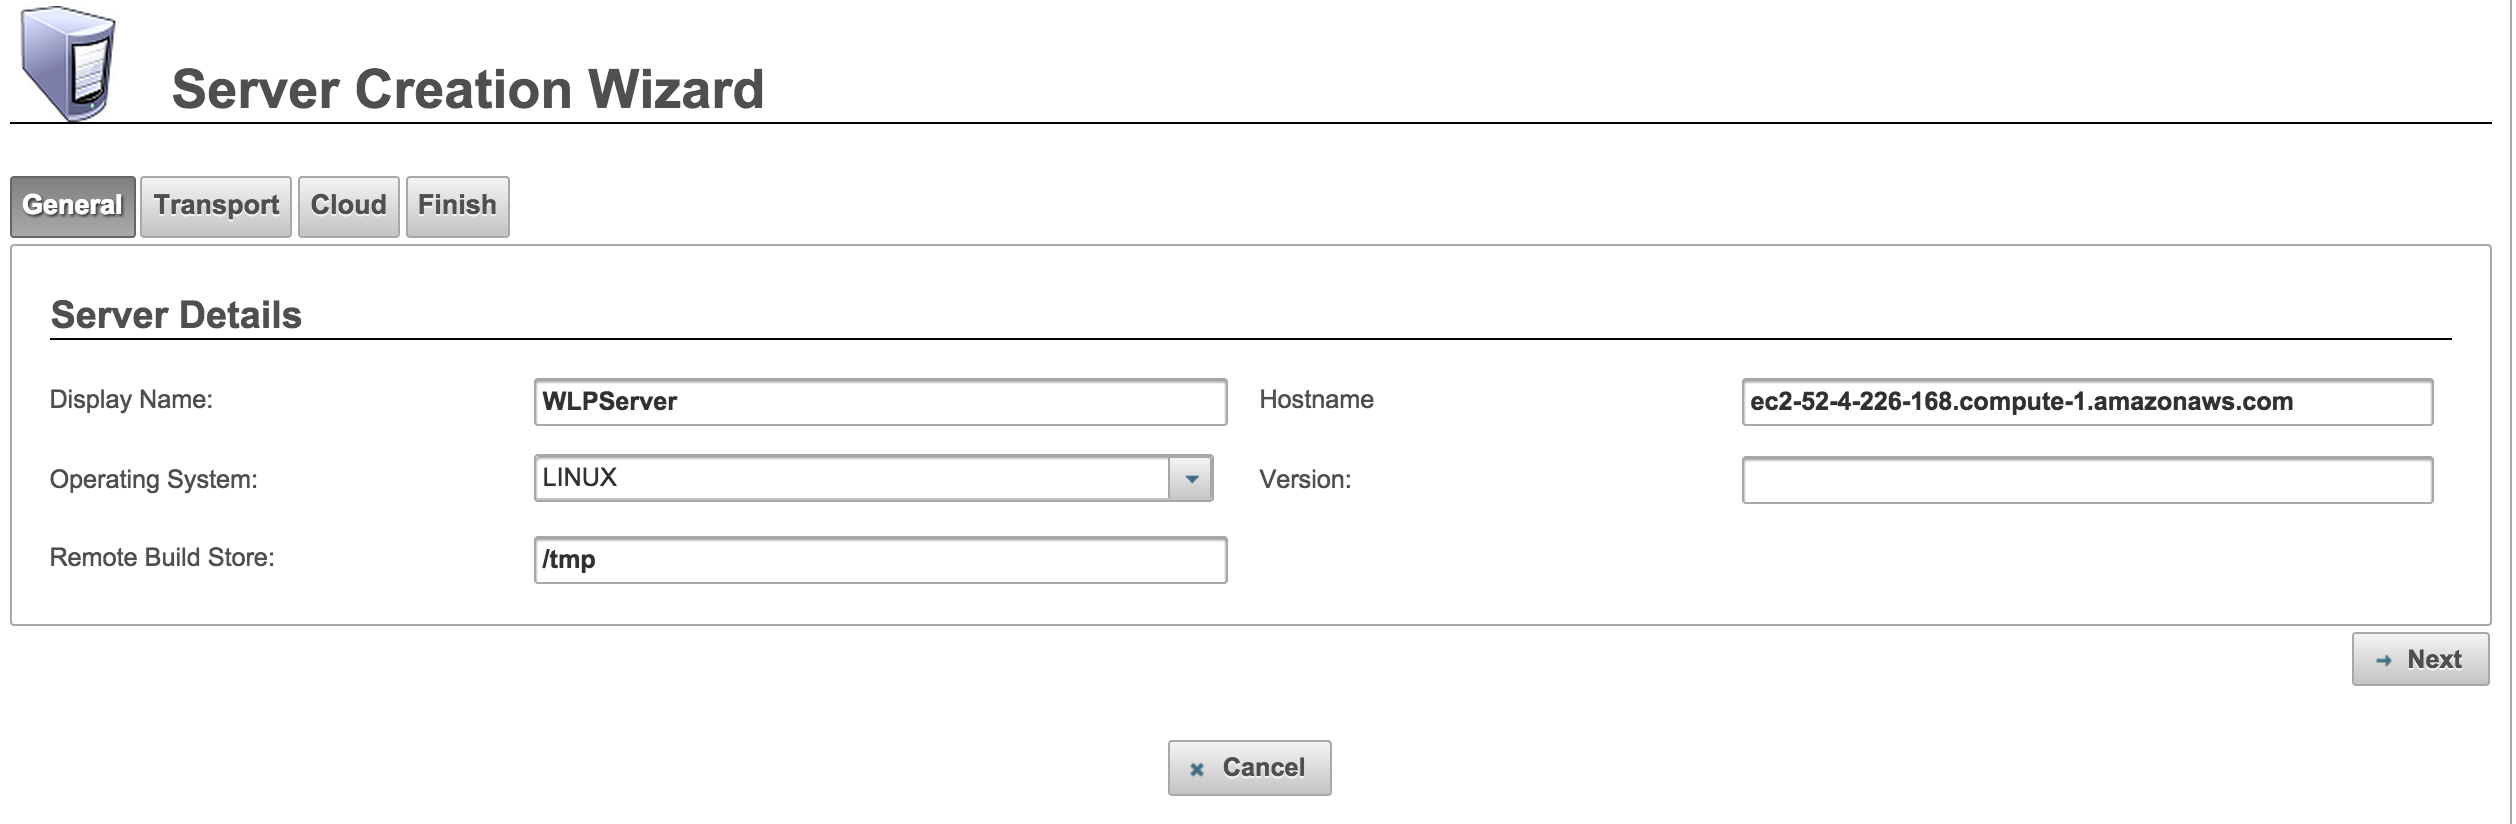
Server General Tab - Select the 'Transport' tab. From the drop-down, select 'SSH Transport'.
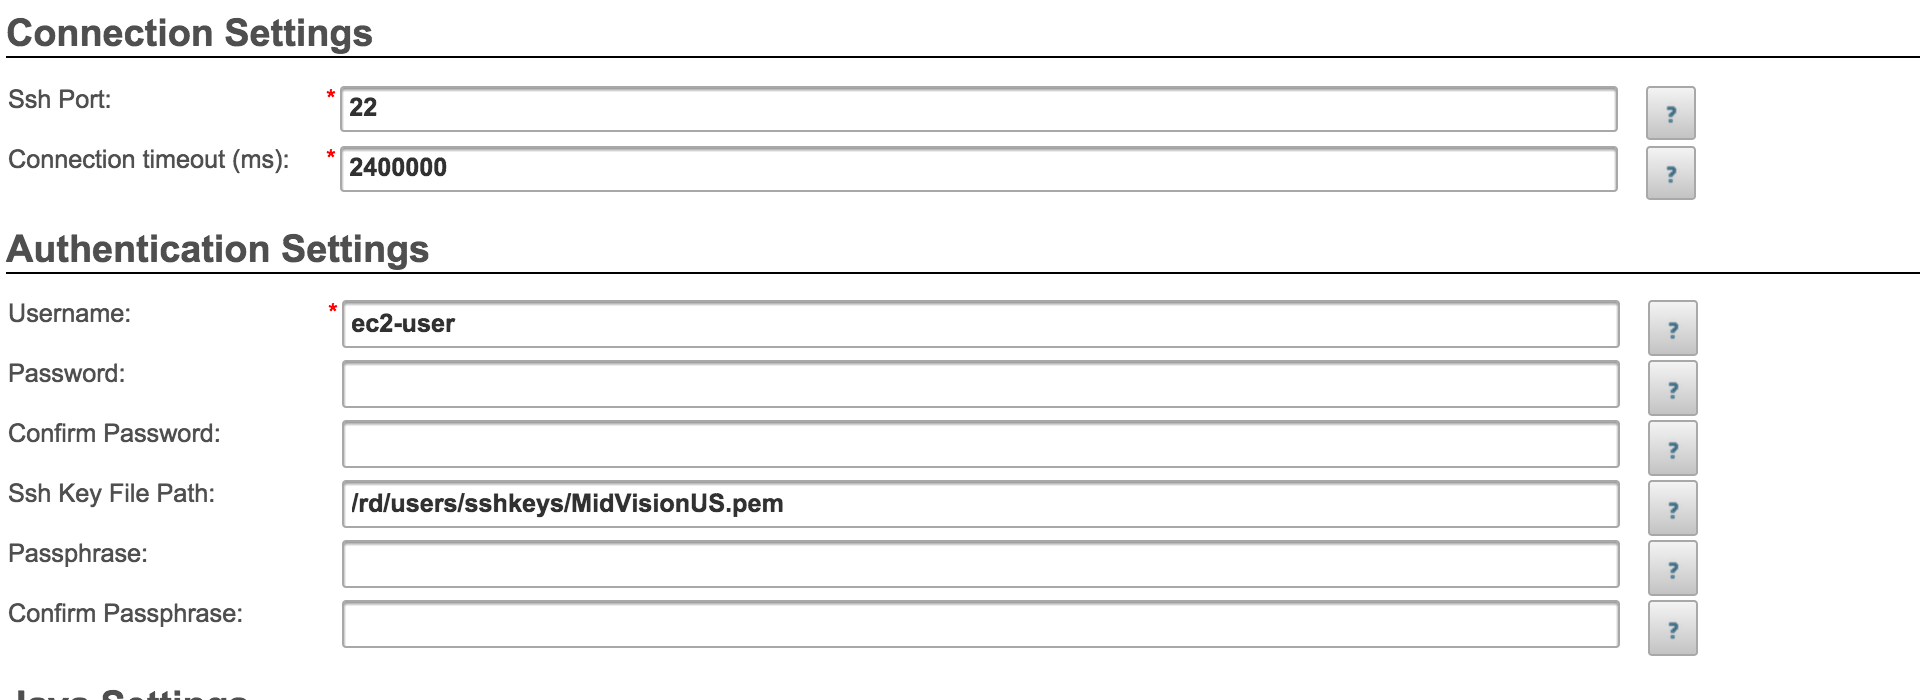
Server Connection Settings Tab - Fill in the transport tab. Use the data you collected in the prerequisites. Once you have filled in the data, choose the 'Test Connection' button to check that you can connect to the target successfully.

Server SUDO settings - Leave the next 'Cloud' tab blank.
- On the final summary tab, click the 'Create This Server' button.
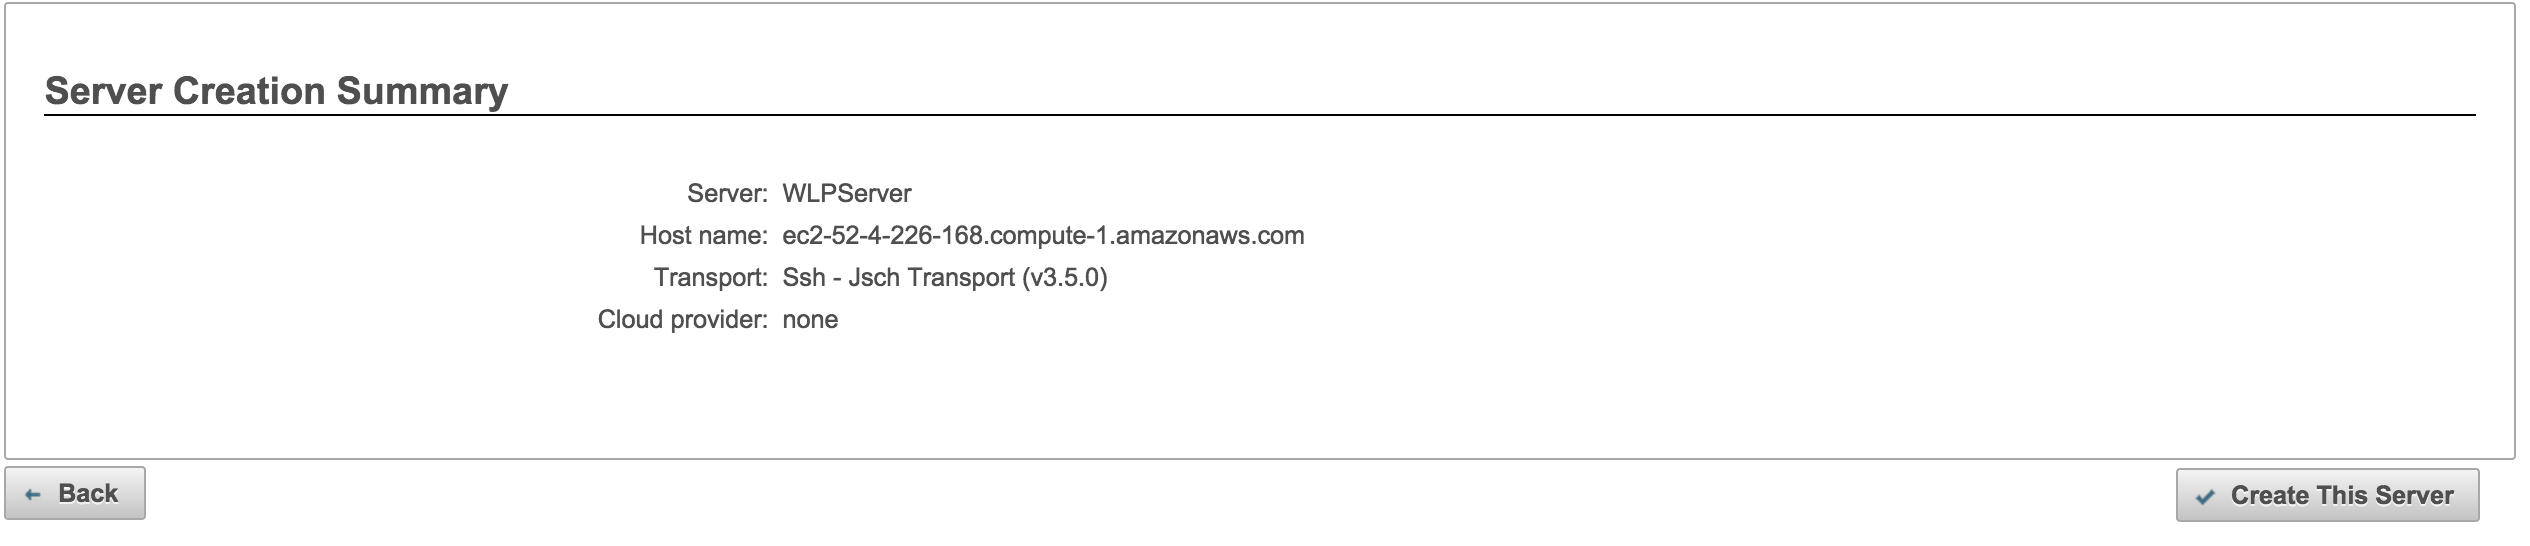
Server Summary Tab You have now created a target for deploying the WebSphere Liberty Profile components on to.
Create a WebSphere Liberty Profile environment definition in RapidDeploy
- Select Resources > Targets > Environments from the side menu. Click the 'Add Environment' Wizard button in the top right hand corner.
- Select the 'Parent Server' to be the server we previously created [WLPServer]
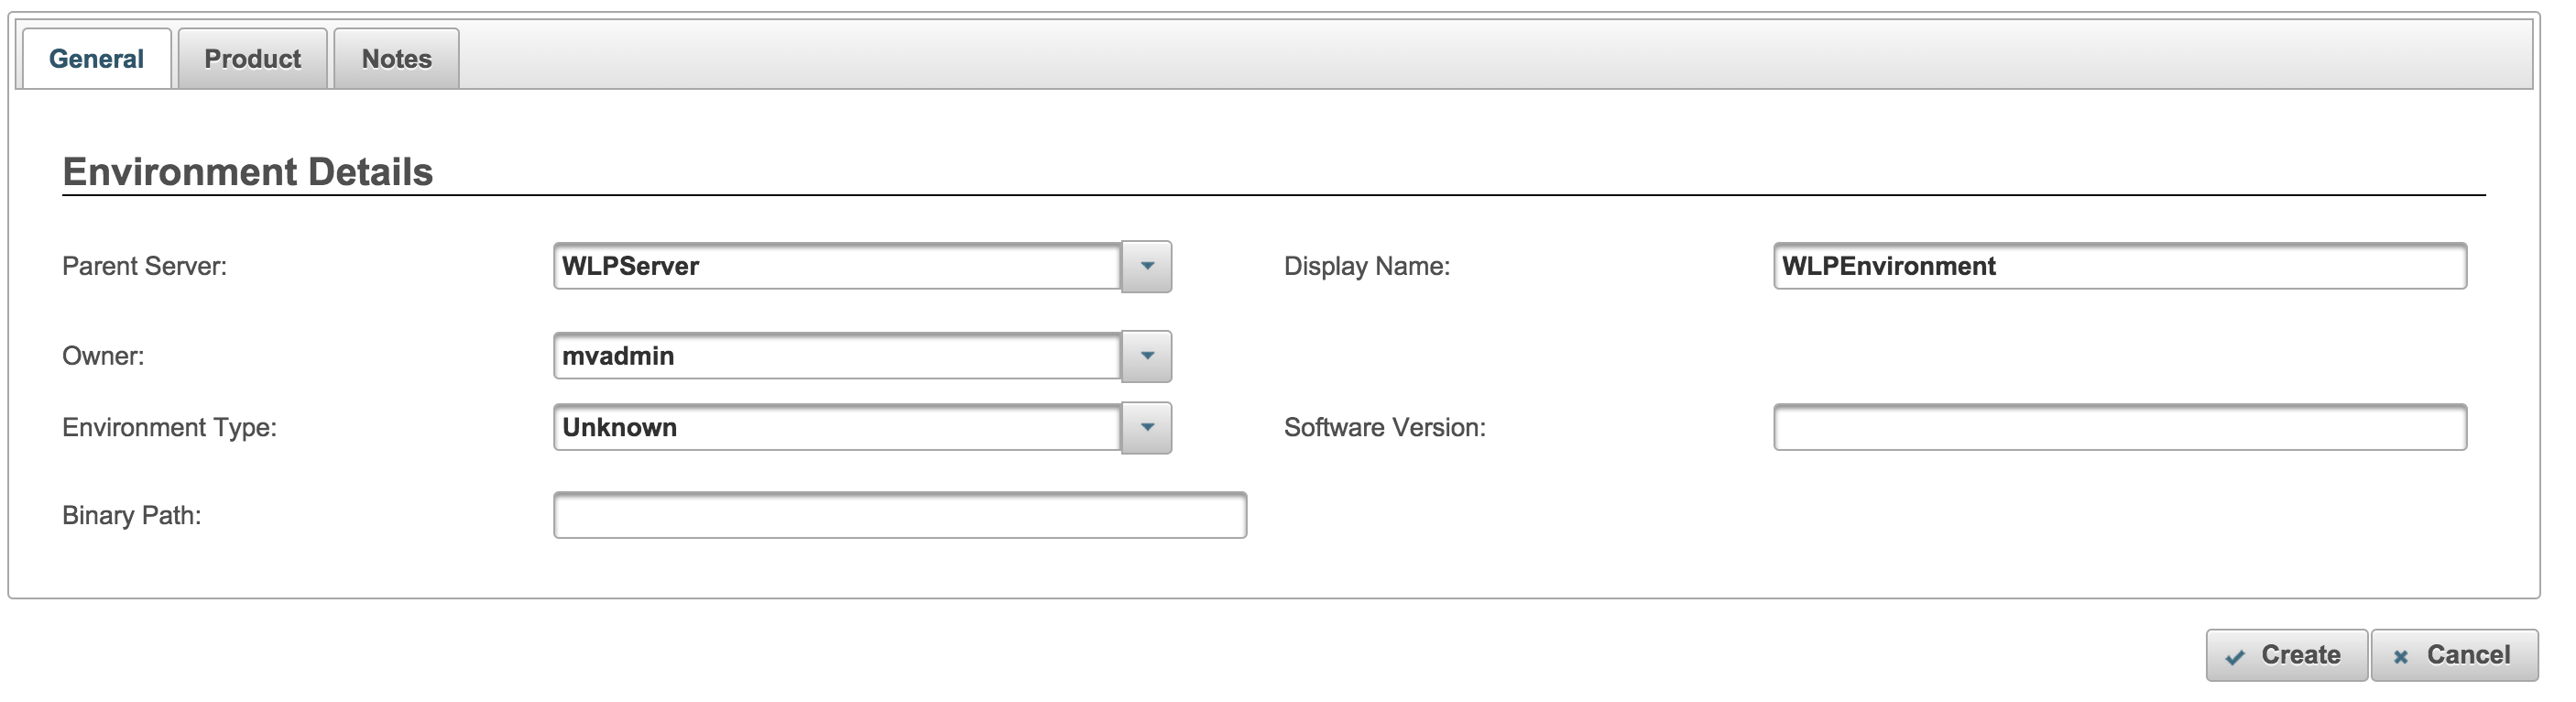
Environment details Tab - Give the environment a name, for example [WLPEnvironment]
- On the 'Product' tab, select the 'WebSphere Liberty Profile Environment' plugin from the upper right hand drop list.
- Fill in the values based on your desired installation characteristics.
- Click the 'Create' button. If any required values have not been completed, they will be highlighted in red.
Create a WebSphere Liberty Profile project in RapidDeploy
- Select Resources > Projects from the side menu. Click the 'Add Project Wizard' button in the top right hand corner.
- On the first tab, give a name to the project, for example [WLPProject] and supply a short description. Click 'Next"
- The 'SCM repository' tab allows you to select an SCM tool. We are using the default of 'Filesystem' which is effectively no SCM. You can safely accept the other defaults.
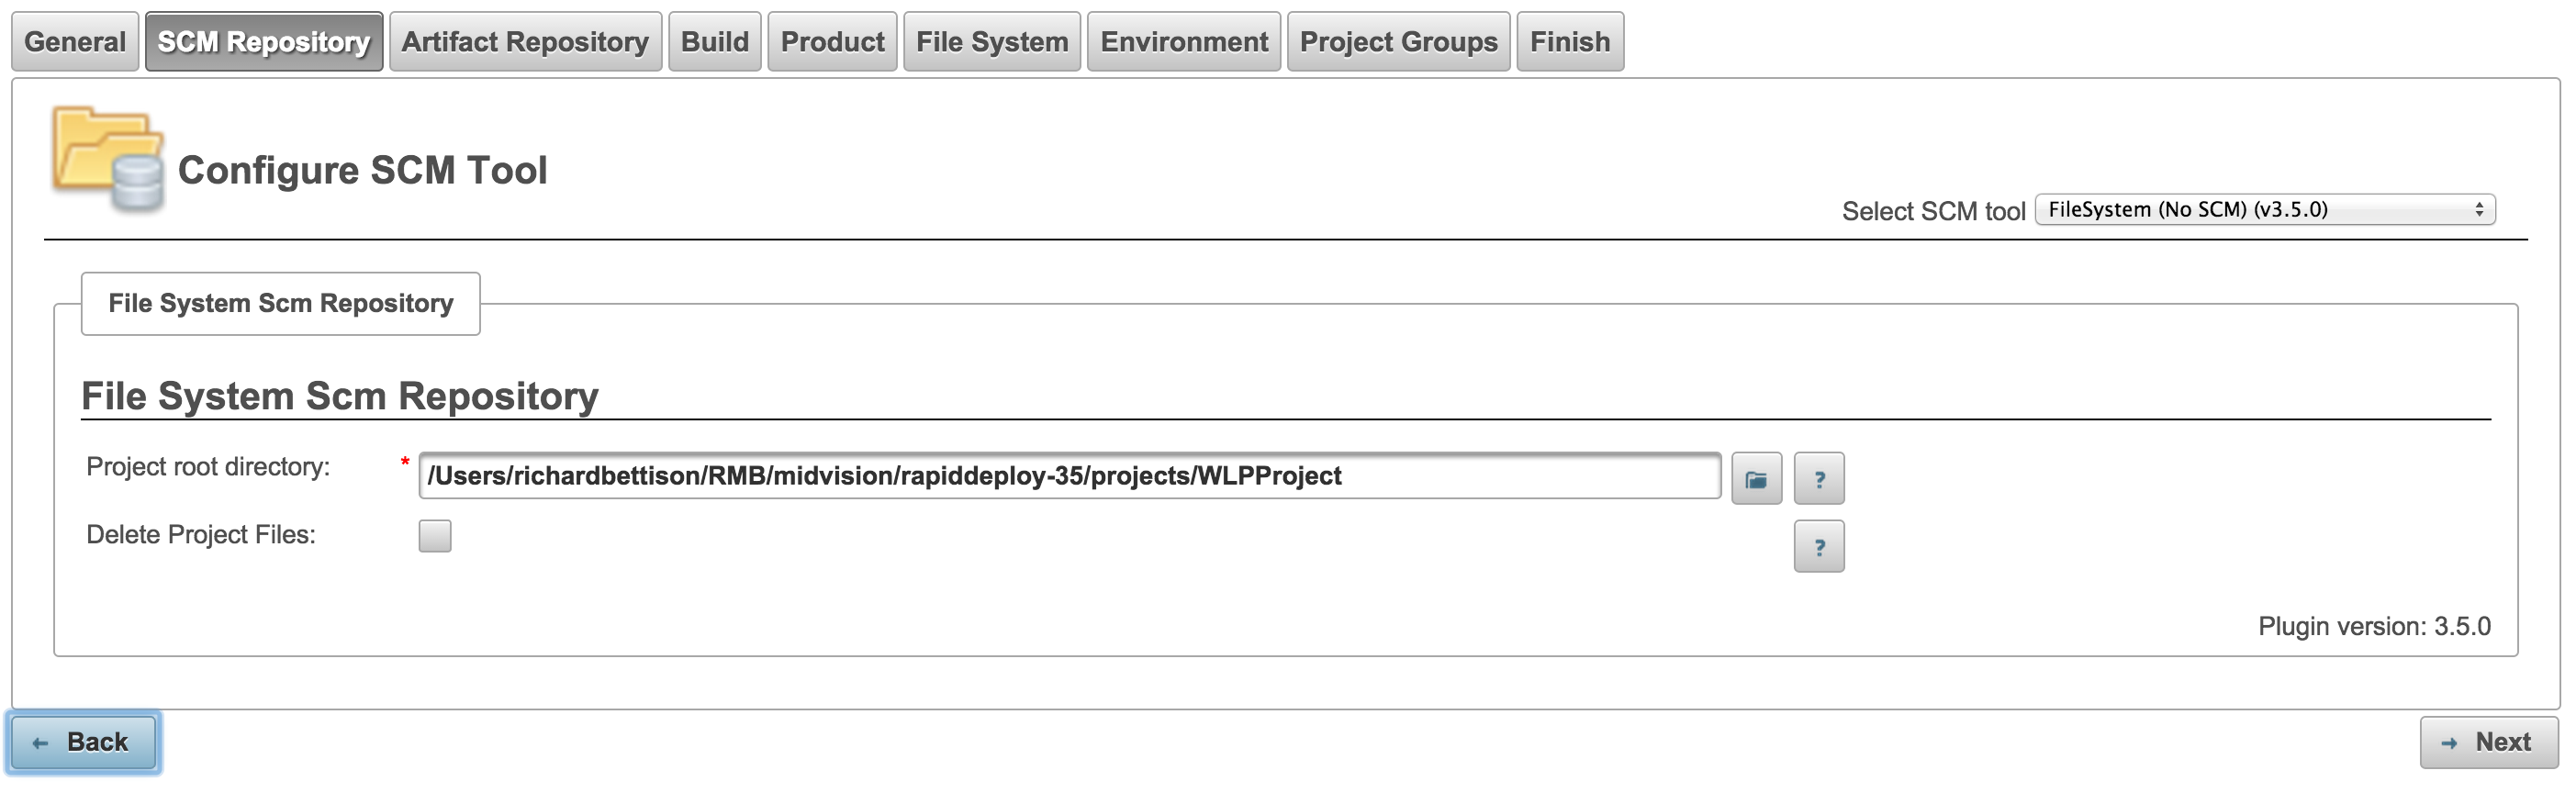
Project SCM tab - The 'Artifact Repository' tab can be left as the default. The search string defaults to the project name, e.g. [WLPProject]
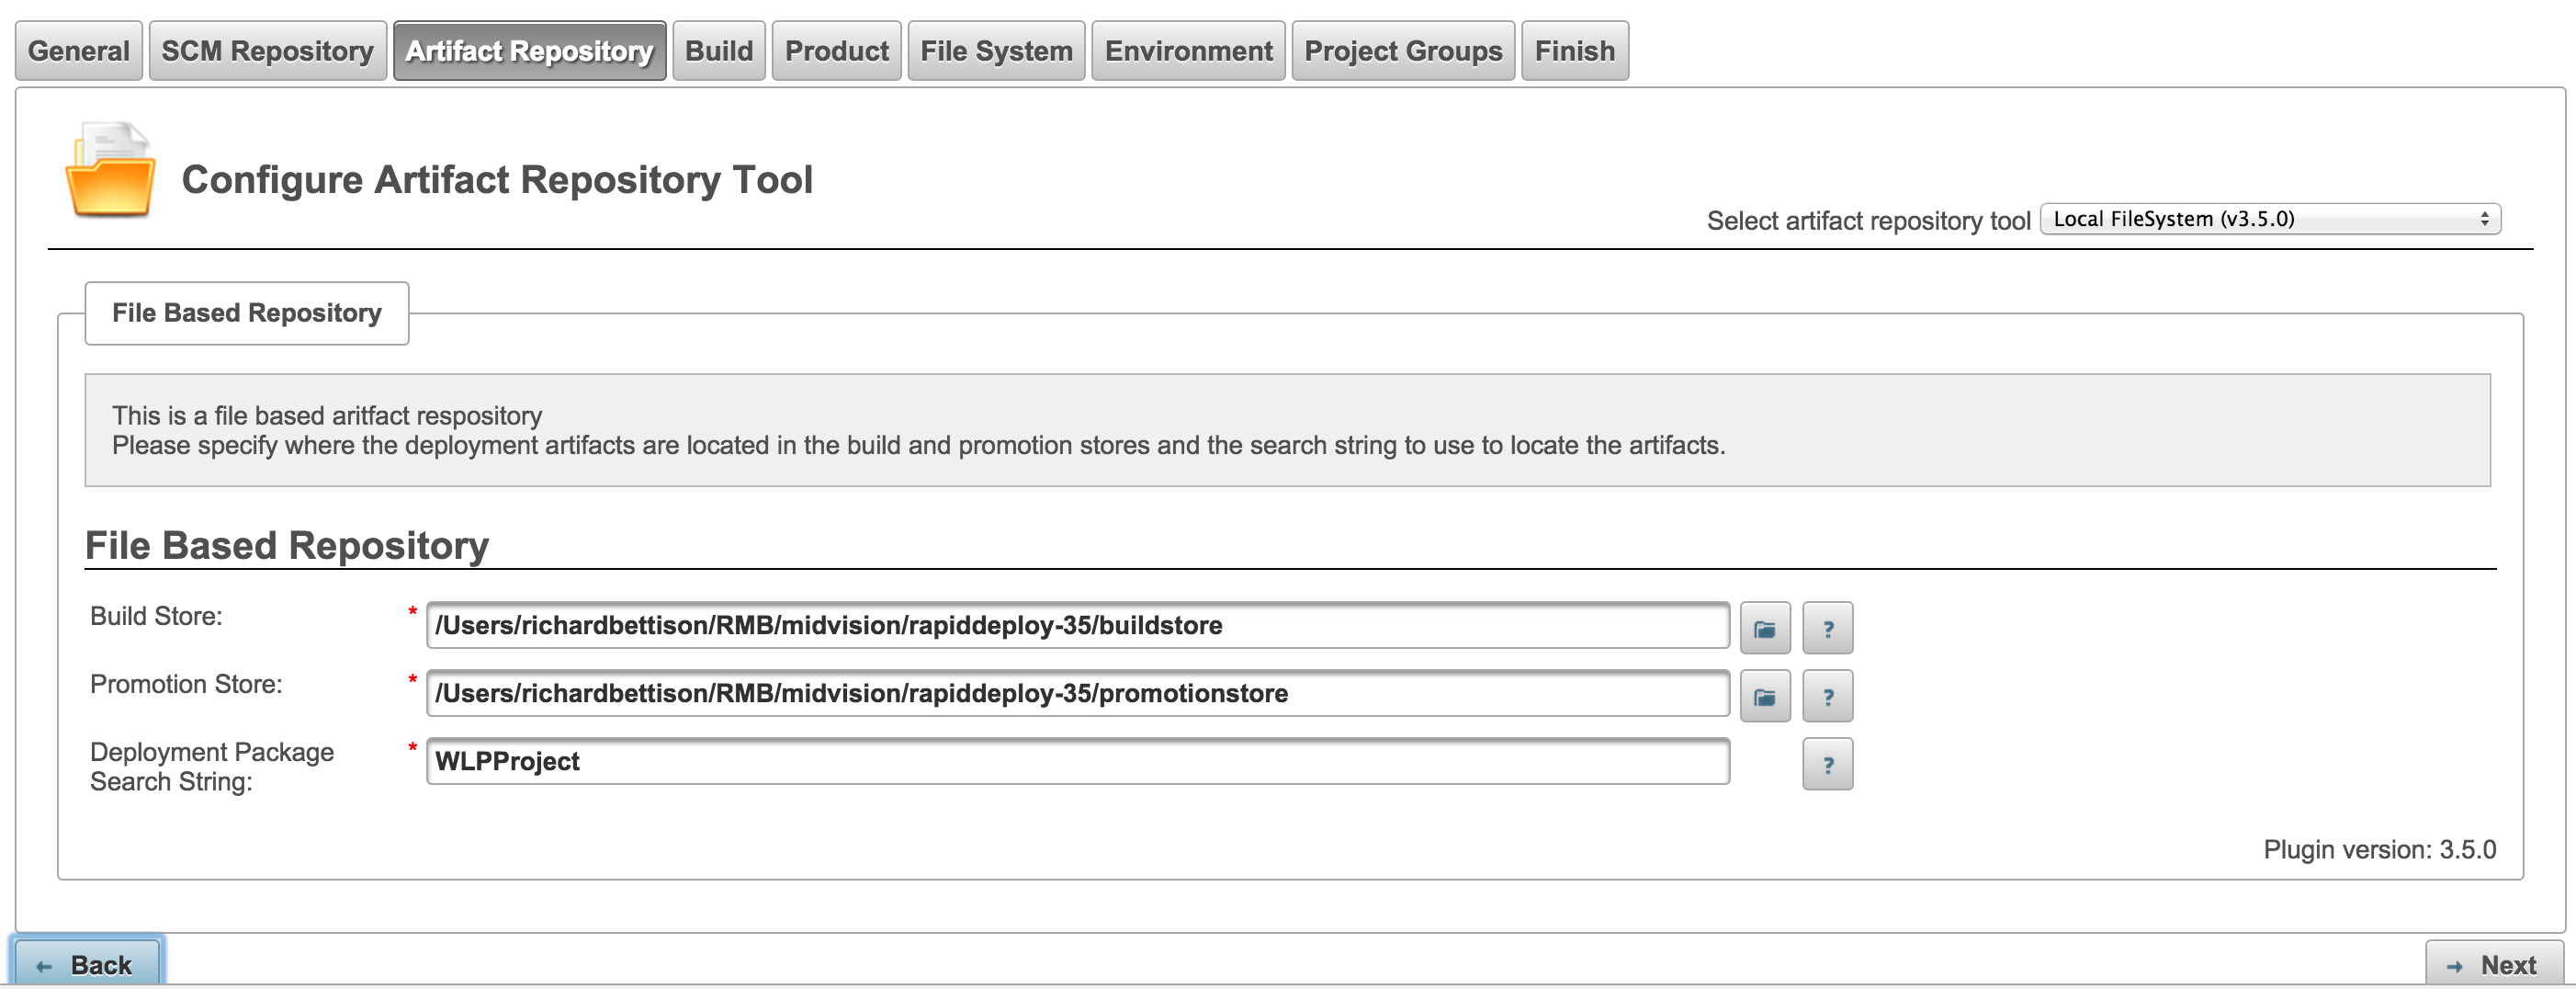
Project Artifact tab - Leave the build tab blank
- Select the 'WebSphere Liberty Profile' plugin from the drop-list on the 'Product' tab. Leave the values as the default.
- Leave the 'File System' tab with default values.
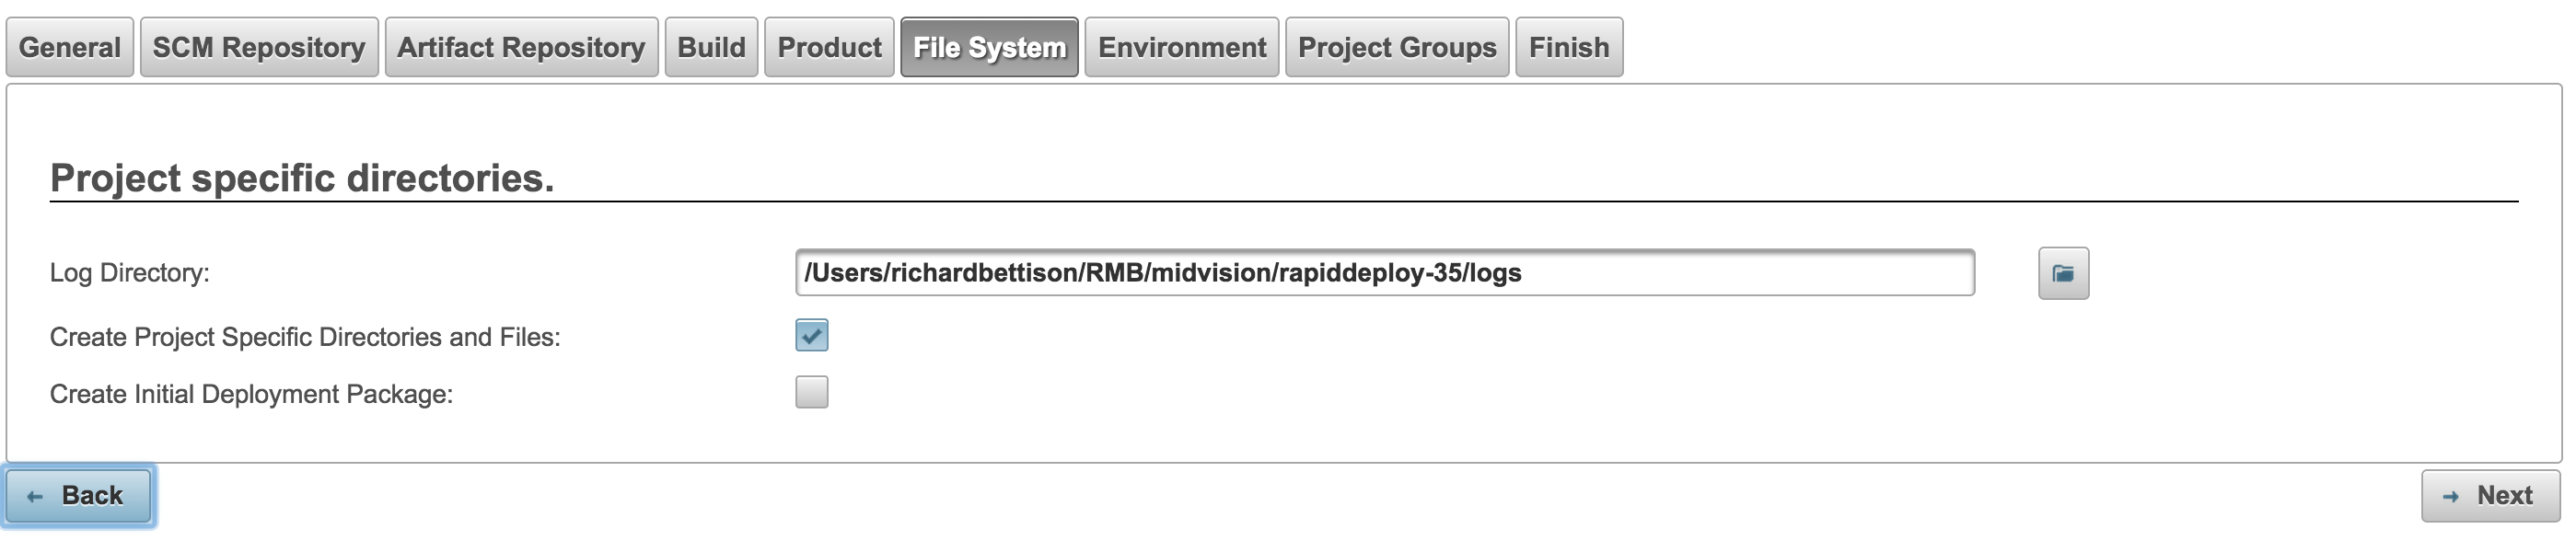
Project Filesystem tab - On the 'Environment' tab, choose the Server and Environment we created earlier. Enter a name for the application.
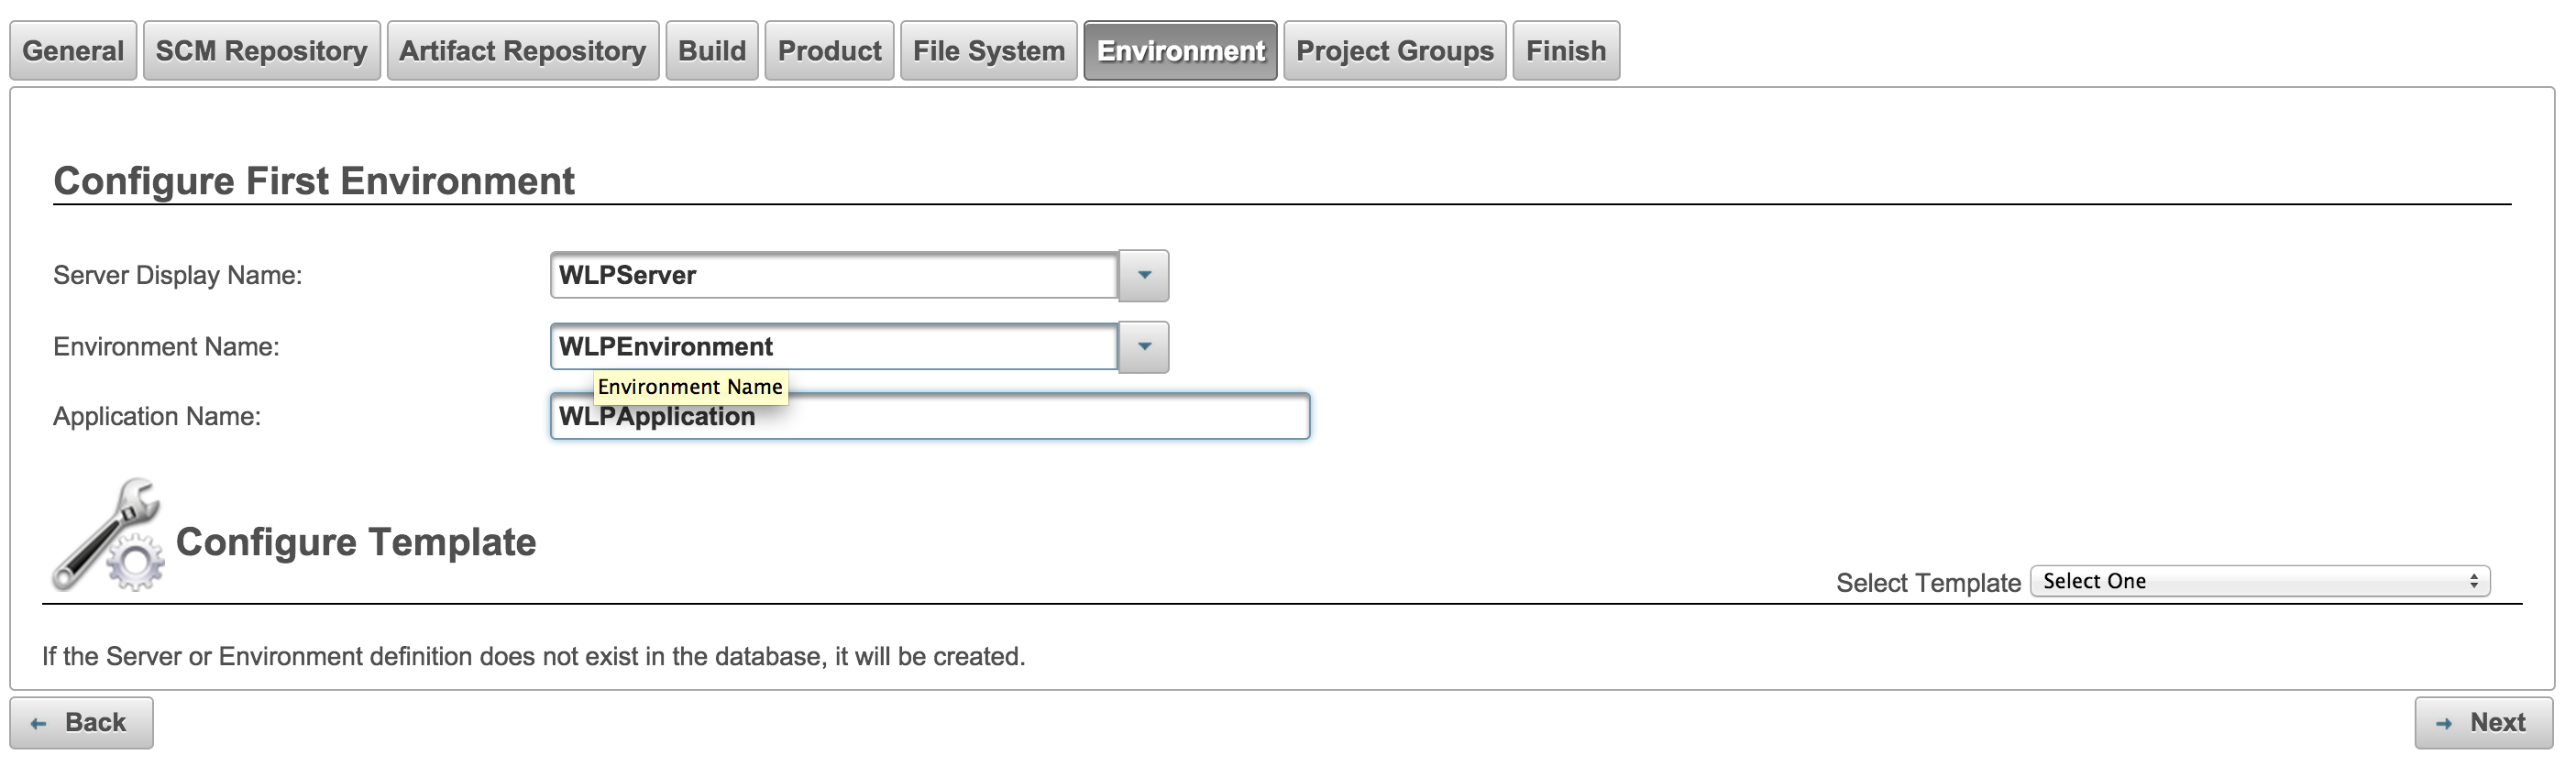
Targets tab - Accept the defaults on the remaining tabs and on the final summary panel, click the 'Create' button.

Project summary
Update Project with a list of tasks to perform
- Select Resources > Projects from the side menu. Click the 'Edit (pencil)' button next to the project you just created.
- Select the 'Orchestration' tab.
- Add the task to install the liberty profile [InstallWebSphereLIbertyProfileTask]
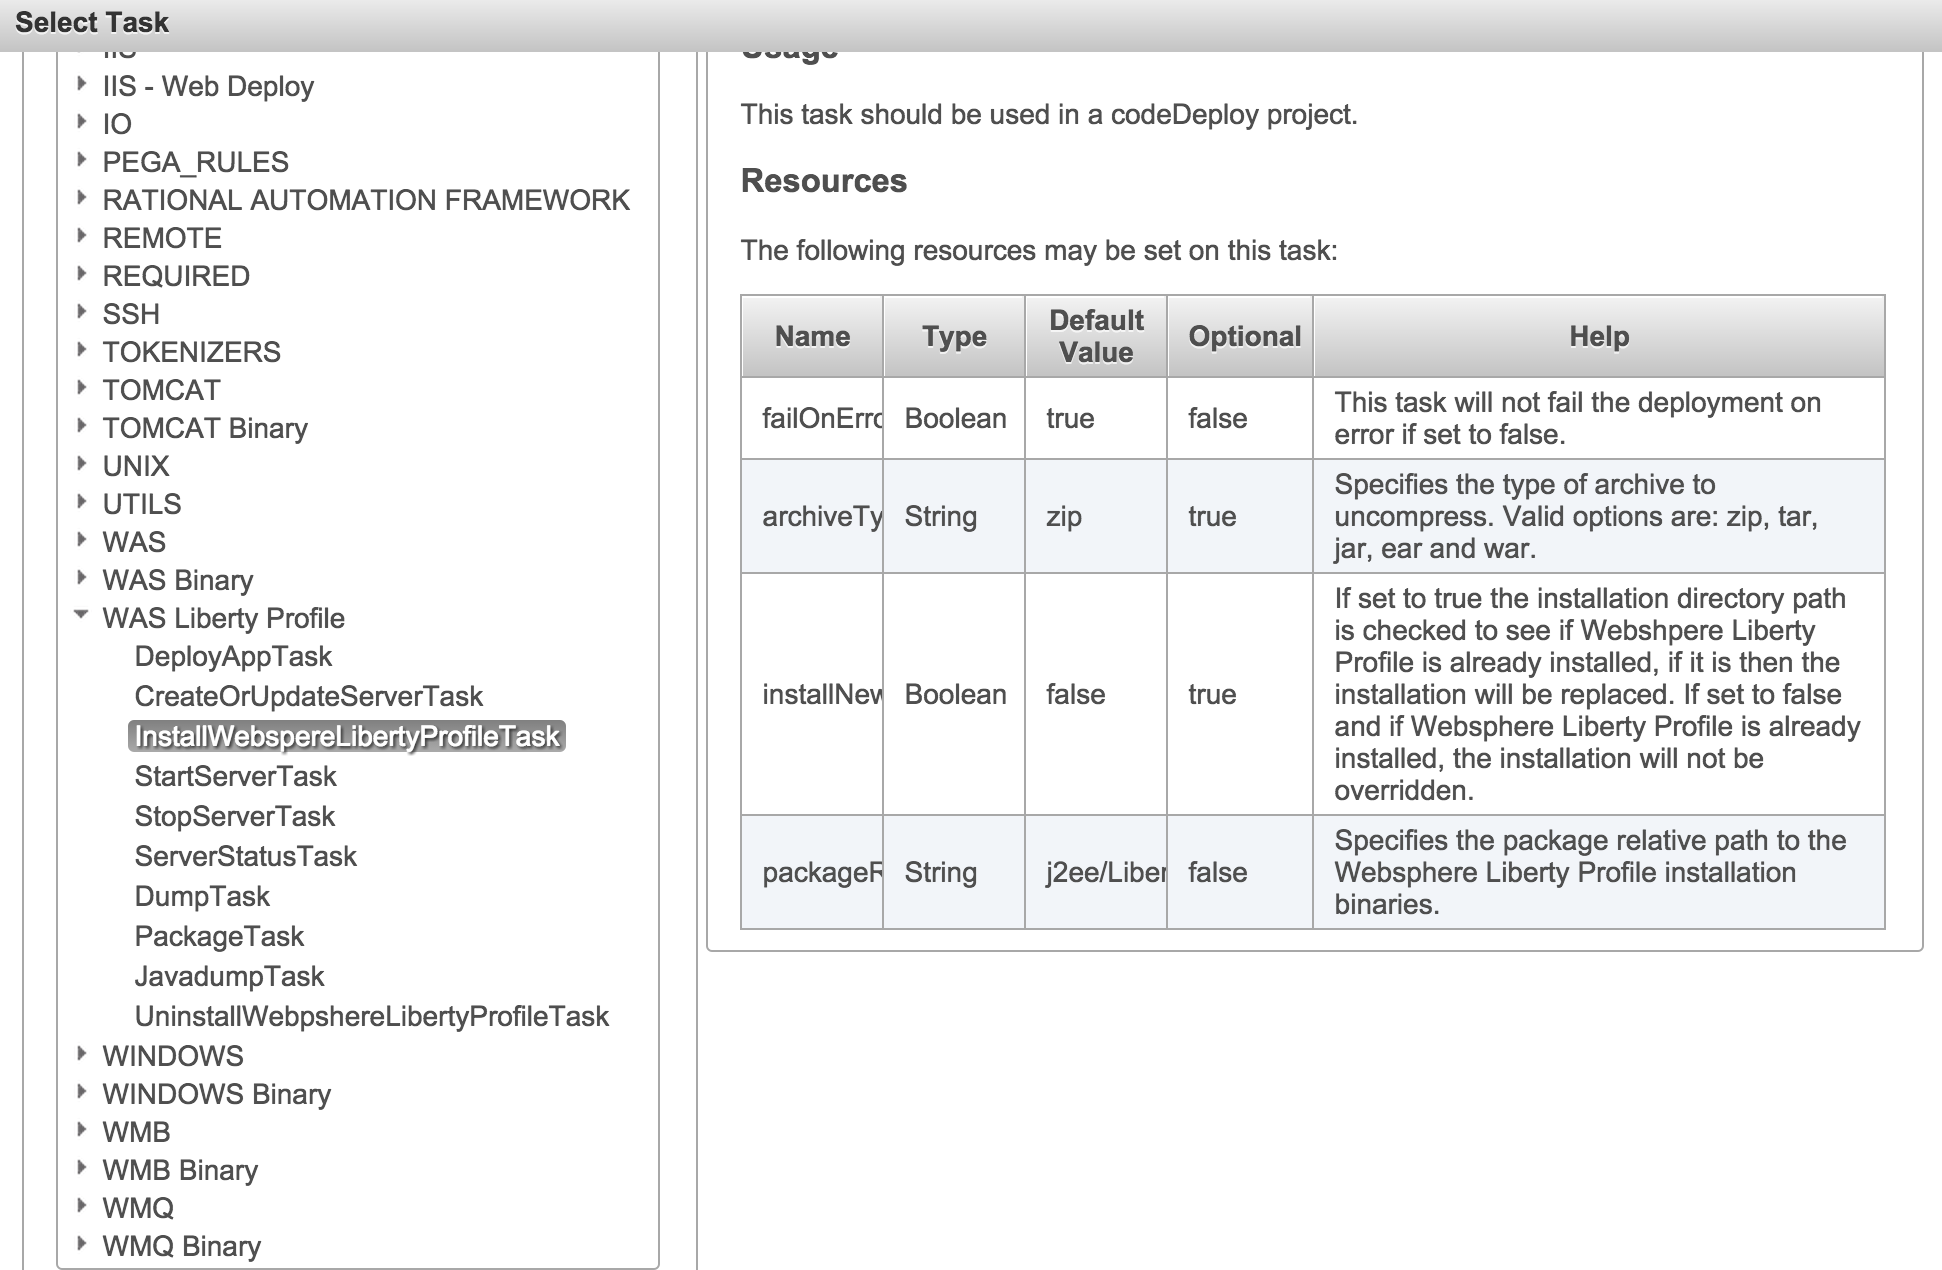
Select task - Add the task to create the server [CreateOrUpdateServerTask]
- Add the tasks to deploy an application [DeployAppTask] and start the server [StartServerTask].
- You should now have a task list similar to:
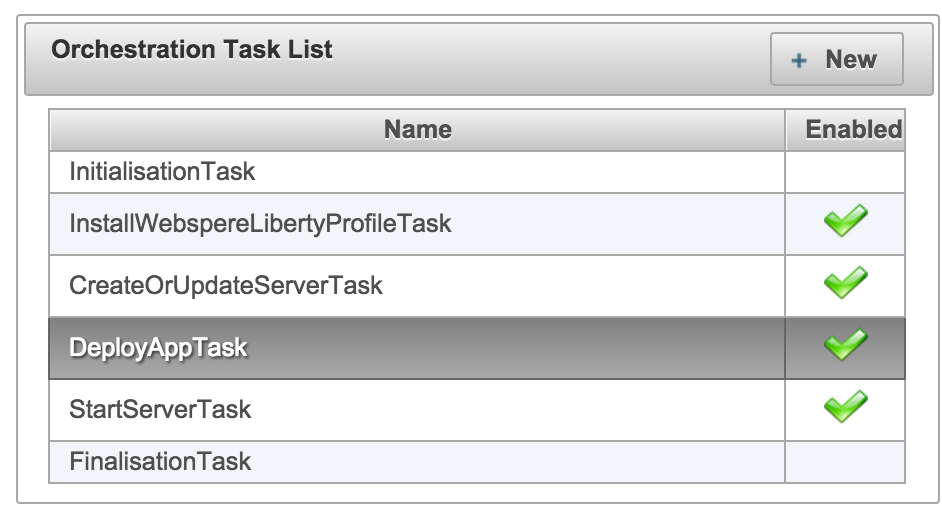
Task list - Save the project.
Upload files from your desktop
- Select Resources > Projects from the side menu. Click the 'Edit (pencil)' button next to the project you just created.
- Select the 'Files' tab.
- Navigate to the project 'J2EE' directory. Which this directory selected, click on the 'Upload button'
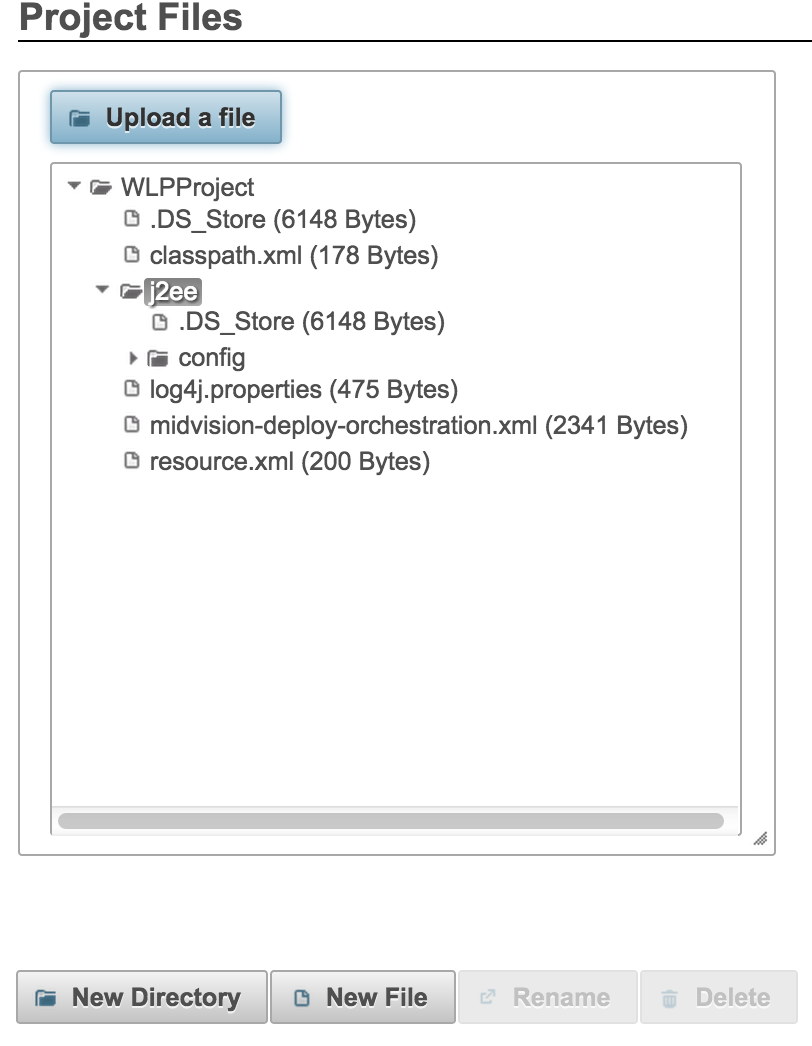
Project files upload - If the [DeployAppTask] was selected and enabled, upload the ear/war file to deploy.
- If the [InstallWebSphereLIbertyProfileTask] was selected and enabled, upload the binary install package. The default IBM package name is [wlp-runtime-8.5.5.5.jar].
Create a Deployment package
- Edit the project we have just created.
- Select the 'Packages' tab.
- Click the 'Create Package' button. A new package will be created automatically.
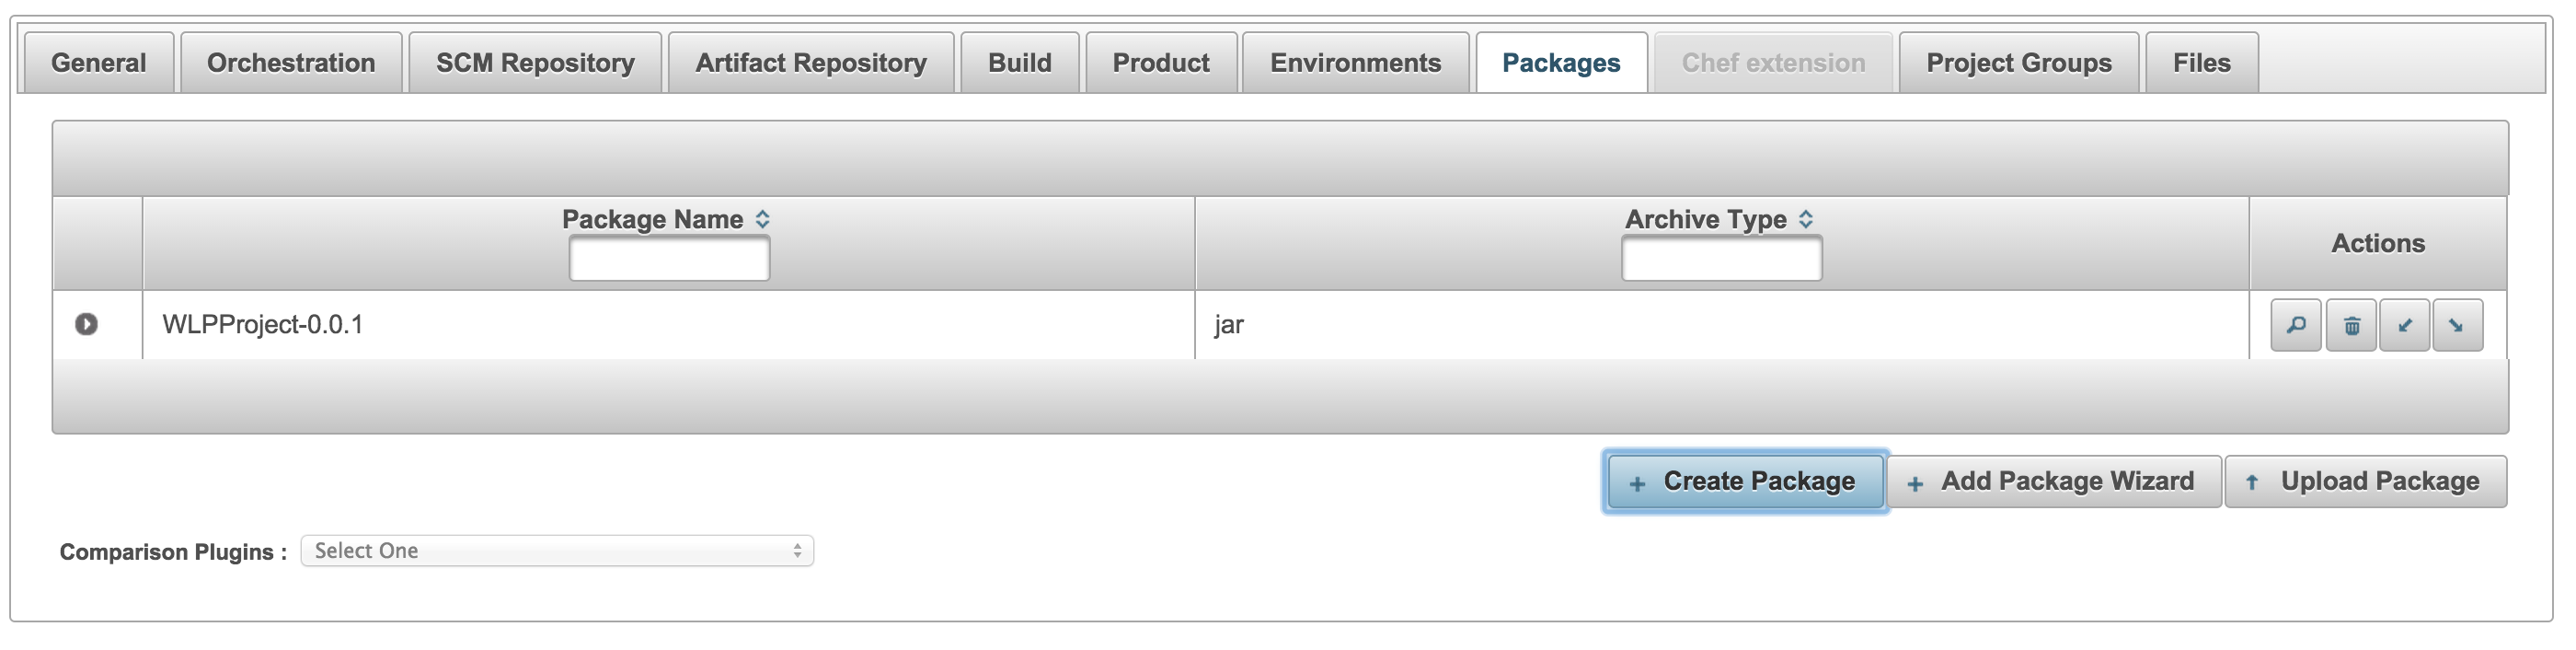
Create a package
Perform a deployment
We now have a project that determines WHAT we are going to do. We also have environment configuration that determines WHERE this will be done. We can now perform a deployment.
To do this simply click on
- Jobs > New Job and select your project
- Select the environment and application (there is only one). When you click the application it will appear in the 'Deployment Schedule' panel. Click 'Next'.
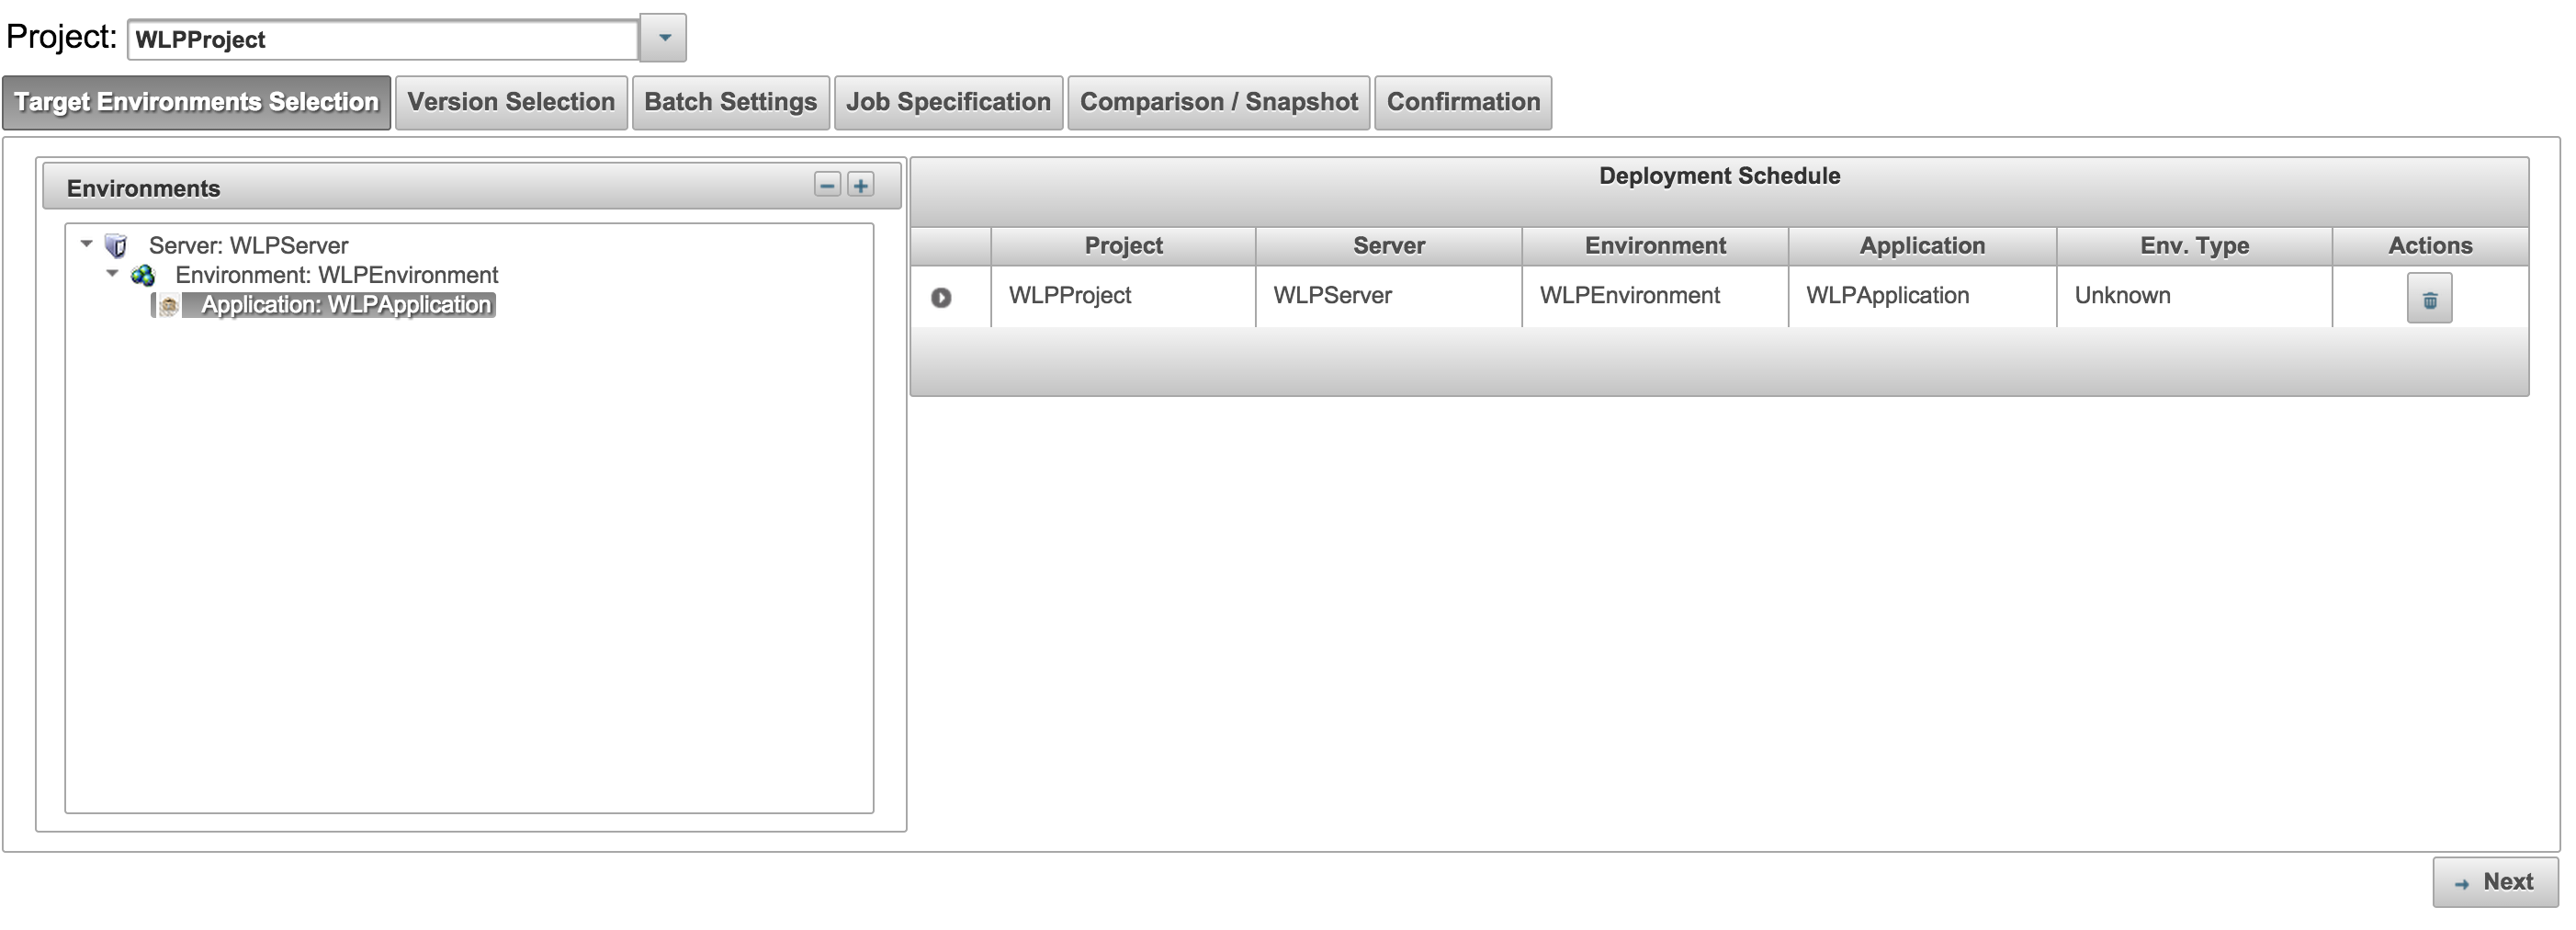
Select an application - On the 'Version Selection' panel, accept the default of the latest package version. Tick the 'Skip to finish' checkbox if it is not already selected. Click 'Next'

Select a version - On the summary, panel, click 'Start Jobs'. Complete any optional summary notes and click 'Yes'
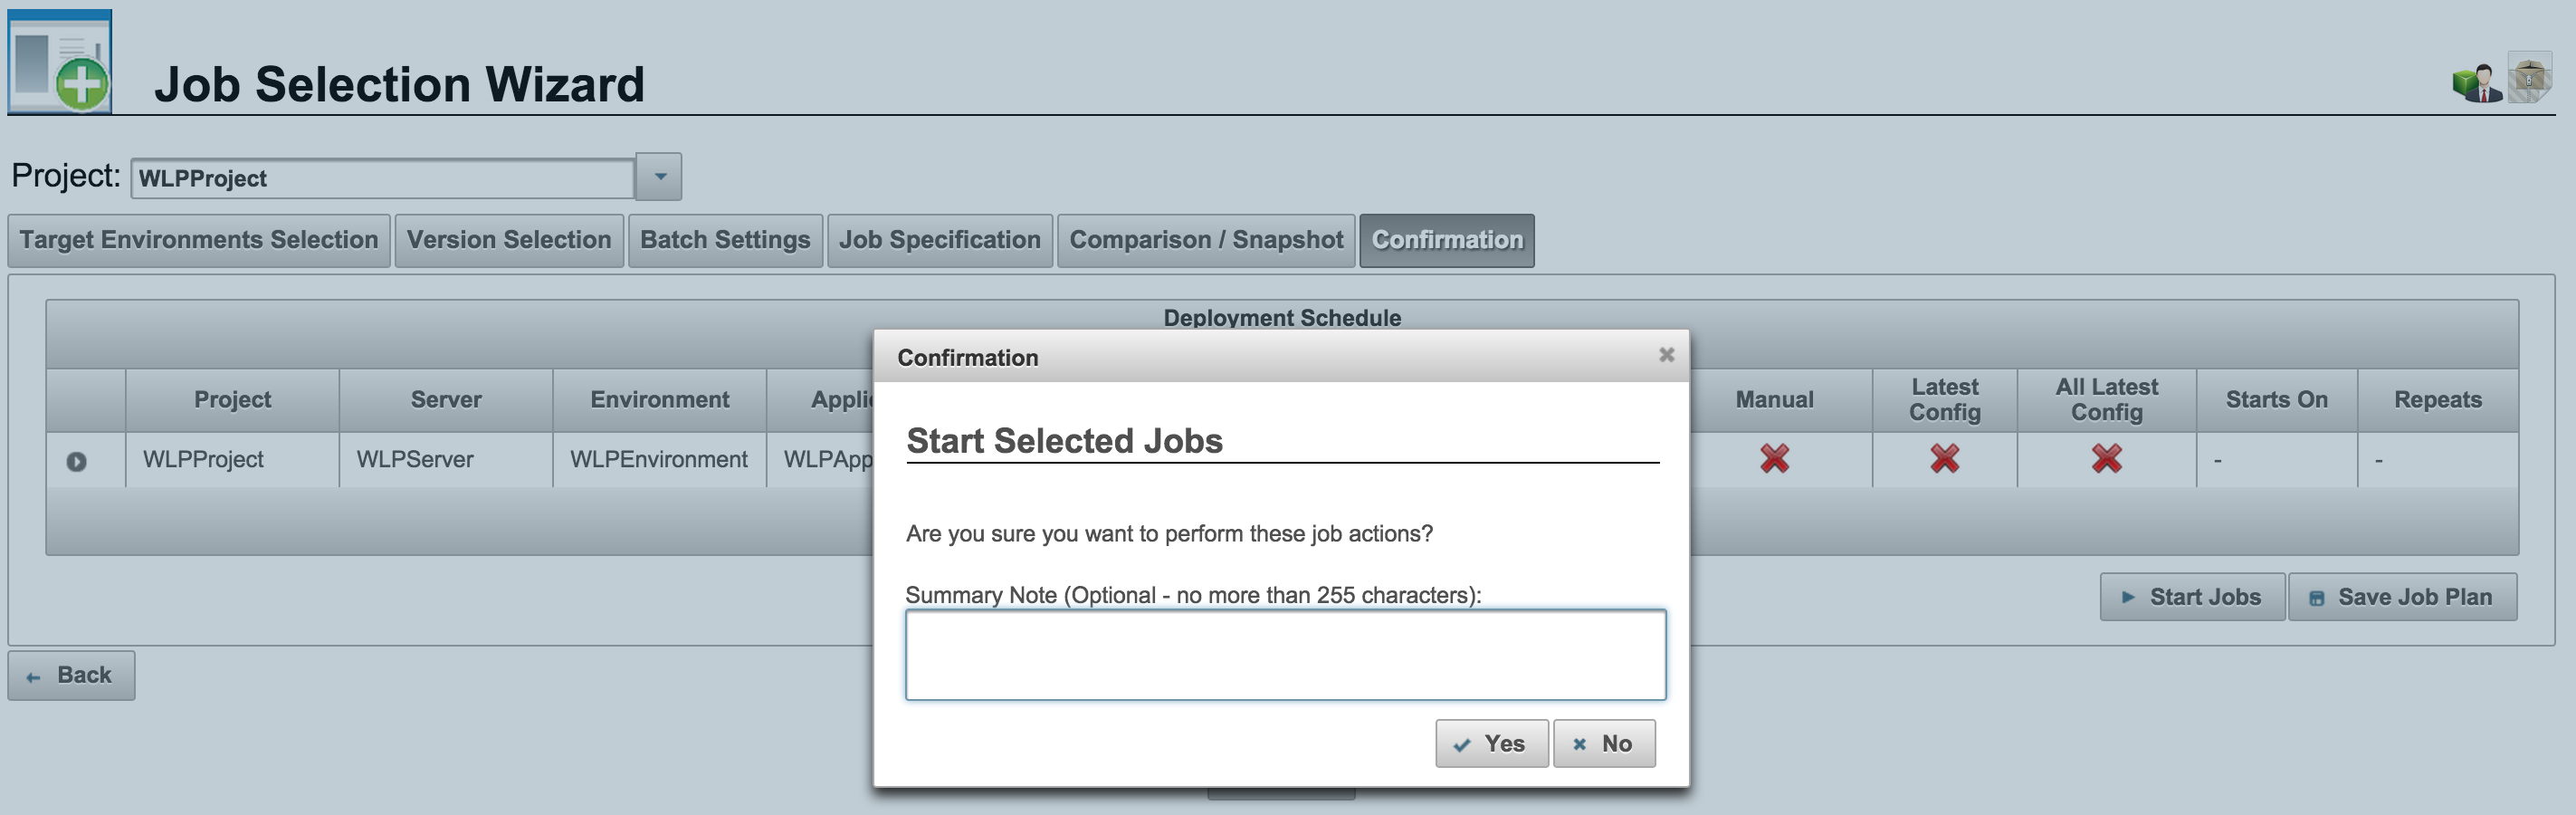
Run the job
Test your deployment
In order to test the deployment, connect to the Web URL of your web server using http://YourHostIP:9080/YourContextRoot
Conclusion
We have shown how RapidDeploy can install WebSphere Liberty Profile to a location of your choosing. You can scale this to deploy to all of your endpoints simply by creating more server objects and/or environment installations. We also have shown the simple use of one of our transport mechanisms, an SSH connection.
There is much more that RapidDeploy can do and we are very keen to assist you as you explore it further.