
Getting Started with the IBM MQ plugin
Overview
The IBM MQ plugin provides extended functionality for the management of IBM MQ on distributed platforms and the Mainframe (zOS). In general it enables users to install and uninstall IBM MQ, its fixpacks, and APARs. It further allows the creation of IBM MQ queue managers in highly available configurations (including Multi-instance queue managers) and the creation, update and removal of MQ Objects that exist within a queue manager. The IBM MQ plugin is a set of pre-written orchestration tasks that perform the aforementioned actions within the existing RapidDeploy framework that already delivers secure, role-based access and audited interactions with remote targets.
Supported versions and platforms
| Operating Systems | Linux (all flavours) AIX Solaris HP-UX Windows If Client or ClnChlTab mode is being used, then it is also possible to deploy configuration only to various other target platforms via client connectivity. This includes: zSeries iSeries Tandem |
| IBM MQ Versions | WebSphere MQ 6.x WebSphere MQ 7.0 WebSphere MQ 7.1 WebSphere MQ 7.5 IBM MQ 8.0 IBM MQ 9.0 IBM MQ 9.1 |
| JDK | JDK 1.8 or higher is required for deployments. The Java JDK can be managed from the RapidDeploy framework if desired. |
| Browsers | IE 8+, Firefox 5+, Google Chrome. Minimum advised screen resolution is 1024 x 768. |
| Other | Root access (or sudo to root) to target Unix servers (as MQ requires installations to be performed as root) A file-system or directory with access to a minimum of 512 MB of free disk space is required on each target This space requirement may increase substantially when deploying many release versions or to many IBM MQ instances. |
Installing IBM MQ
IBM MQ can be installed by creating a project for this purpose (refer to general documentation for the creation of RapidDeploy projects).
- As you progress through the "Create Project" wizard, note the "Package Search String" which will be important when you create the Binary Package used to install IBM MQ.
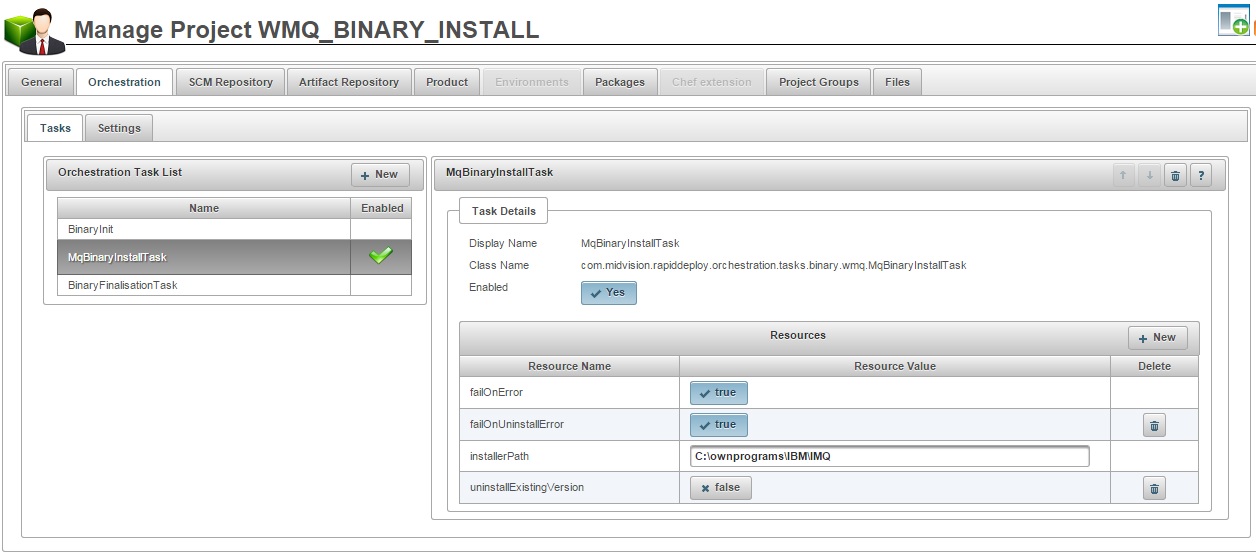
- Your project will require the "IBM MQ Binary Install" task (see below for alternative tasks) in the Orchestration tab. If you have no IBM MQ installed on your target you need to ensure you uncheck the "uninstallExistingVersion" orchestration resources.
Once you have created the project perform the following tasks.
- Define a target server (see create server documentation for creating this object).
- Create a deployment package. Follow the detailed instructions on how to package the IBM MQ binaries.
- Deploy the binary file. Once the project has been created and a deployment package exists for the platform being deployed to a deployment job can be requested:
- Navigate to Jobs > New Job Plan.
- Select the box marked as 'Empty' and choose the "IBM_MQ_BINARY" project.
- Select the target.
- Select the version (package) to deploy.
- Click the "Run" button.
Installing IBM MQ on a Windows server - step by step tutorial (RapidDeploy 3)
- Download the binaries from the Software Access Catalog Downloads to the machine where your RapidDeploy instance is running.
- Create a new project in RapidDeploy, for example "IBM_MQ_BINARY_INSTALL".
- When the project is created go to the "Orchestration" tab and add the "IBM MQ Binary Install" task to your orchestration:
Orchestration tab - Prepare the Deployment Package.
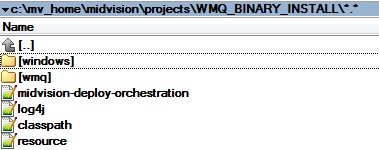
- Navigate into the file system where the project root folder is (see the "Project root directory" in the "SCM Repository" tab), create a new folder named "windows" inside the project root directory and then create a folder where you will extract the IBM MQ binaries (for example "wmq75"):
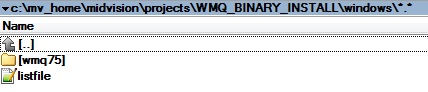
Project root directory - Create a new "listfile.txt" file under the "windows" directory:
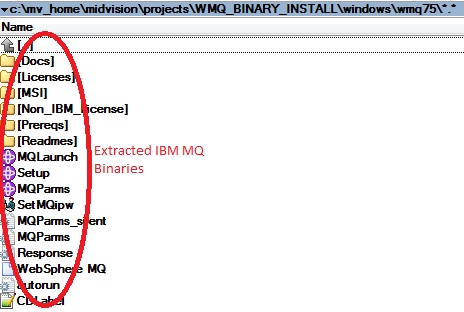
Windows directory - Under the "wmq75" folder you have the IBM MQ binaries:
MQ binaries - For Windows the listfile contains the "Installer" command along with any required parameters (e.g. response files), this is how it looks like in this example:
wmq75\MSI\IBM WebSphere MQ.msi responseFile=wmq75\Response.ini
- Add the "license agreement" and the path where you want to install IBM MQ to your "Response.ini" file:
AGREETOLICENSE="yes"
PGMFOLDER="C:\ownprograms\IBM\IMQ"
- When it is ready, go to your project panel in the RapidDeploy web console and create a new "Deployment Package" from the "Packages" tab.
- Navigate into the file system where the project root folder is (see the "Project root directory" in the "SCM Repository" tab), create a new folder named "windows" inside the project root directory and then create a folder where you will extract the IBM MQ binaries (for example "wmq75"):
- Create a new Environment Installation for the project you created and the remote server where you want to install IBM MQ:
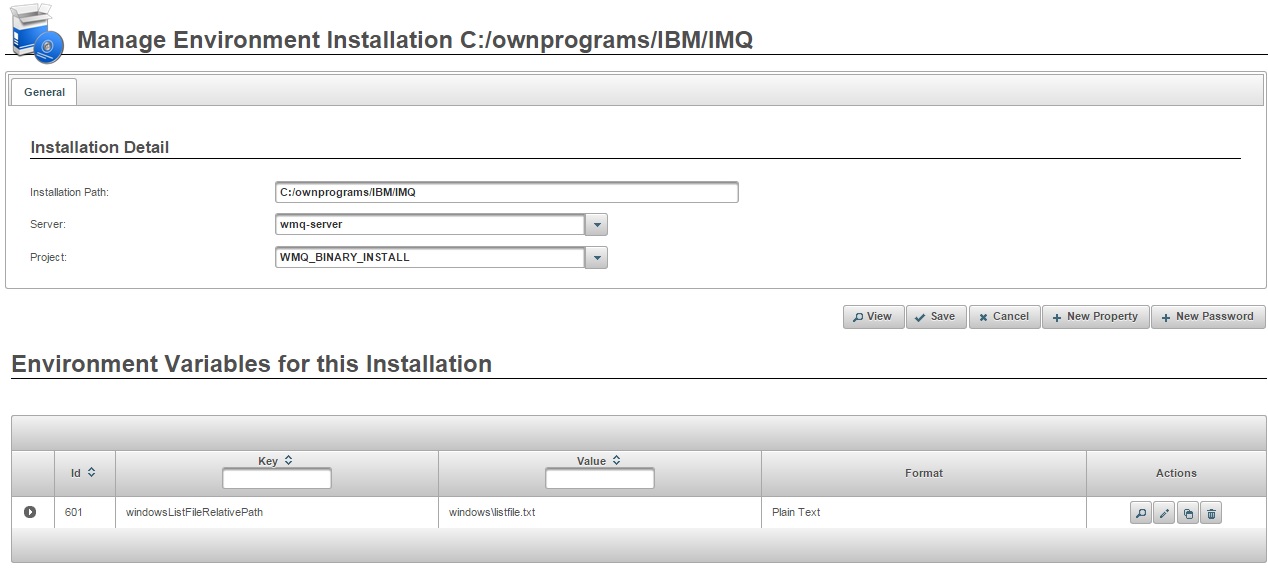
Note that you need to specify the path to the listfile you have created in the previous step by adding a new property to the Environment Installation.
- Now that the project and the environment are created everything is ready to perform the installation. In order to do that go to the "Jobs" menu, select the project and the environment and start the execution.