
Writing a Java Task - Part 1
RapidDeploy is pre-loaded with over 200 tasks and functions. However, we cannot cover everything that an organisation might want to automate. Therefore the framework can easily be extended to write any automation tasks required, in the robust and industry standard Java programming languages.
Customer assets written in this way are decoupled from the RapidDeploy application it their own Jar files, and will require no updating as the customer upgrades to new versions of RapidDeploy.
The following section guides you through creating a java task to be used in a RapidDeploy orchestration, deploying the task and running it.
This example extends the "Hello World" Project to add an additional task. Please download and run the "Hello World" project before starting this task.
Download and Install Pre-requisites
- Download a suitable Java IDE. In this case we are using Eclipse Helios.
- Obtain a copy of the rapiddeploy-orchestration-dist.jar file, which can be found in your MidVision RapidDeploy installation in the lib directory
Set up the workspace (Eclipse Example)
- Open a new workspace.
- Open the Java perspective
- Create a new Project. File - New - Java Project
- Name the project, for example MyRapidDeployTasks
- Create a new project - MyRapidDeployTasks
- To create the project, click Finish
- Highlight your project (MyRapidDeployTasks)
- Right - click - select Build Path - Add External Archive
- Add the rapiddeploy-orchestration-dist.jar file you identified earlier.
- In the Project explorer pane, navigate to the "src" directory inside the created project, right click and add a new Package. New - Package.
- Name the package (for example "com.mycompany.rapiddeploy.ext.tasks"), this is where the task classes will be created.
- Click Finish
- In the Project explorer pane, navigate to the "src" directory inside the created project, right click and add a new Package. New - Package.
- Name the package (for example "tasks.xml"), this is where the task meta information will be created.
- Click Finish
Create a Java Task
- Create a new Class. On the "tasks" package, right click and a add a new Class. New - Class
- Name the Class, for example "HelloWorldTask"
- Click Finish
- Add the code into the class and save the class. Sample code can be found in the download at the bottom of this page.
This "HelloWorldTask" task will take in four parameters - failOnError, firstName, lastName and an optional age. It will then print out a different hello world message depending on the parameters that are specified in the task definition.
- Look at the available methods on the superclasses. Type "this." inside the runTask method. You will see all the available methods.
- Look at the available static methods on the CoreTaskHelper class. Inside the runTask, type "CoreTaskHelper."
- Highlight the method for a synopsis of its functions.
Create the Task Meta Information
- Create a new XML file. On the "xml" package, right click and a add a new Class. New - File
- Name the File: "tasksMetaData.xml"
- Click Finish
- Add the following xml into the file and save the file.
<?xml version="1.0" encoding="UTF-8"?>
<tasks pluginName="Custom Tasks">
        <task
                classname="com.midvision.demo.ext.tasks.HelloWorldTask">
                <defaultName>HelloWorldTask</defaultName>
                <category>Custom</category>
                <helpText><![CDATA[<h1>Hello World Task.</h1>

                        <h2>Description</h2>
                        This task prints out a greeting.<br/><br/>

                        <h2>Parameters</h2>
                        The following parameters may be set on this task:<br/>
                        ]]>
                </helpText>
                <parameters>
                        <parameter name="failOnError">
                                <type>java.lang.Boolean</type>
                                <defaultValue>true</defaultValue>
                                <optional>false</optional>
                                <toolTipText>This task will not fail the deployment on error if set to false.</toolTipText>
                        </parameter>
                        <parameter name="firstName">
                                <type>java.lang.String</type>
                                <defaultValue>John</defaultValue>
                                <optional>false</optional>
                                <toolTipText>The first name of the user to greet.</toolTipText>
                        </parameter>
                        <parameter name="lastName">
                                <type>java.lang.String</type>
                                <defaultValue>Doe</defaultValue>
                                <optional>false</optional>
                                <toolTipText>The last name of the user to greet.</toolTipText>
                        </parameter>
                        <parameter name="age">
                                <type>java.lang.Integer</type>
                                <defaultValue>52</defaultValue>
                                <optional>true</optional>
                                <toolTipText>The age of the user to greet.</toolTipText>
                        </parameter>
                </parameters>
        </task>
</tasks>
This task meta-information file describes the attributes and parameters of a task. This information here is used by the Web user interface to tell it out how render task on the screen and how the task should be written to a project orchestration file.
Create and Deploy the Jar File
In order to use our new task, we need to compile and package it into a Jar, then deploy that jar to the RapidDeploy lib directory ($MV_HOME/lib). All Jar files deployed to the RapidDeploy lib directory will be added to the classpath at run time when the server is restarted, and the tasks will therefore be available to the job process.
- Highlight the "MyRapidDeployTasks" Project, Right Click and select "Export". Then Select Java - Jar File
- Select "Java/JAR file" type to export, then click Next.
- Enter the destination for the Jar file.
- Select the jar file name and destination, then click Finish. The jar file is exported to the selected destination.
- Copy this new JAR file to the $MV_HOME/lib directory and restart the RapidDeploy application server.
Create an Orchestration Step Using This Task
We will update the "Hello World" project with a new step.
- Go to the "Hello World" Project, click the Orchestration tab.
- Select the available task "Custom/HelloWorldTask" and drag it into the orchestration task list.
- Click "Save", then click "Save and Continue" in the confirmation box.
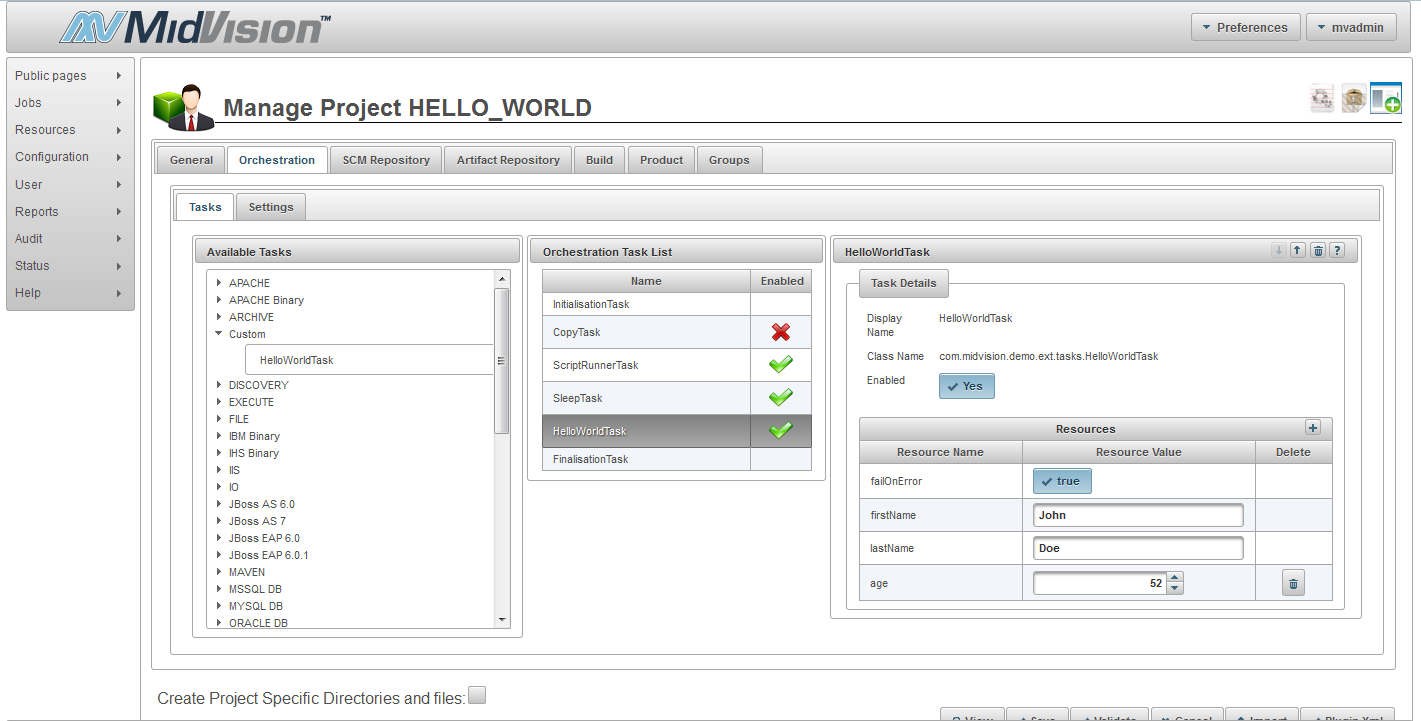
Hello World Project CustomTask
Run the Orchestration
We can run the environment configured in the "Hello World" Project. We should see the task being executed. In the job log file you will see the following output:
Hello John Doe, you are 52 years old.
Conclusion
We have seen how we can easily create a new RapidDeploy Java Project, package and deploy it to our RapidDeploy installation. We have also executed this task as part of a project orchestration. In Part 2 of this tutorial we will look at how the created task can use built in functions and features to give us a rich programming environment to enable us to automate almost any task.