Converting an installation snapshot to a template
Many plugins support taking a snapshot of installation configuration and retrieving it back to the framework server for use to either perform comparisons over time or to use as a basis (template) to to create new installations.
Here we look at using a snapshot and using it to create a template for new installations.
Prerequisites for creating templates
You will need to have taken a snaphot of your ideal installation, which will be used as the basis of the template.
Creating a template
- Log into the framework server. Go to Projects. Select the project where you want to create a template and click the "Edit" button
- On the "Targets" tab, scroll to the bottom of the listed targets, click the "Snapshot to templates wizard" button.
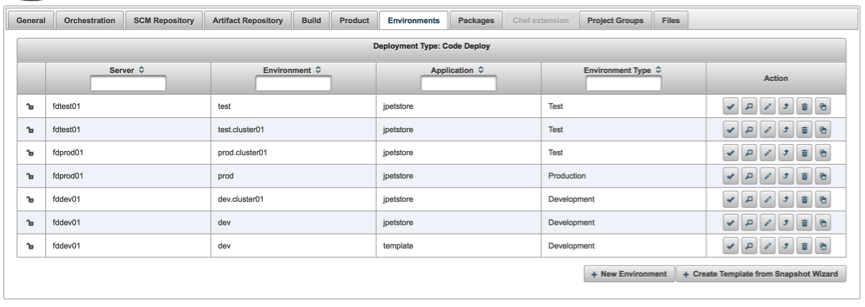
Select Snapshot to Templates - Now follow the instructions in the wizard (example below) to create the template and populate it with the configuration of the first installation to be created.
- Click Next to move to the project selection tab. Create this template in the existing project, as shown below. It is possible to create this in another project.

Select the target Project - On the next screen select the snapshot you require. Only snapshots of the correct type for you project should be displayed.
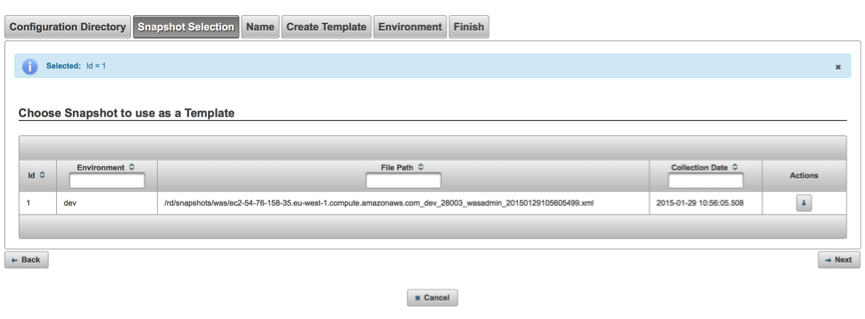
Select the Snapshot - Enter the Server, Installation and Configuration Name for the first new configuration that is based on this snapshot. As shown below:

Select the name for the first installation - You can edit the configuration of the template (either in the browser or download and configure it using a local editor).
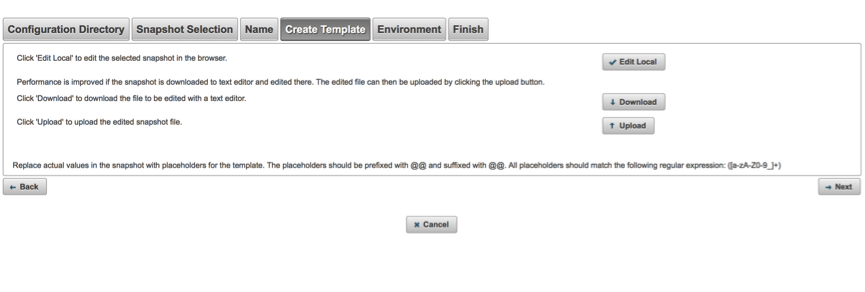
Edit template Configuration - On the Target Tab, any Data Dictionary items defined during the configuration section, will appear and can be amended.
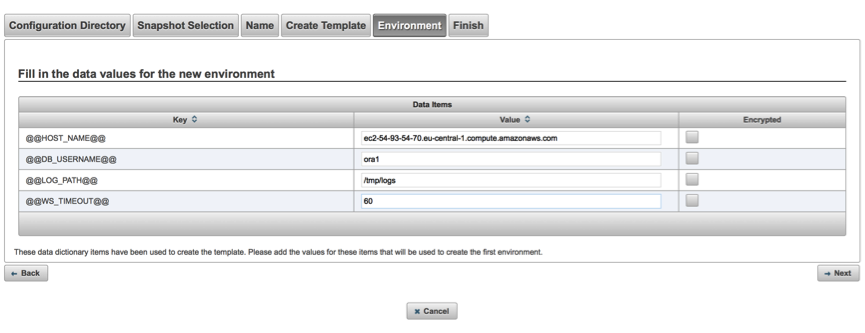
Change Data Dictionary items. - On the final tab you can review and save the configuration by clicking "Create this Installation". The necessary files will be created, in the project context, for this template and first installation.
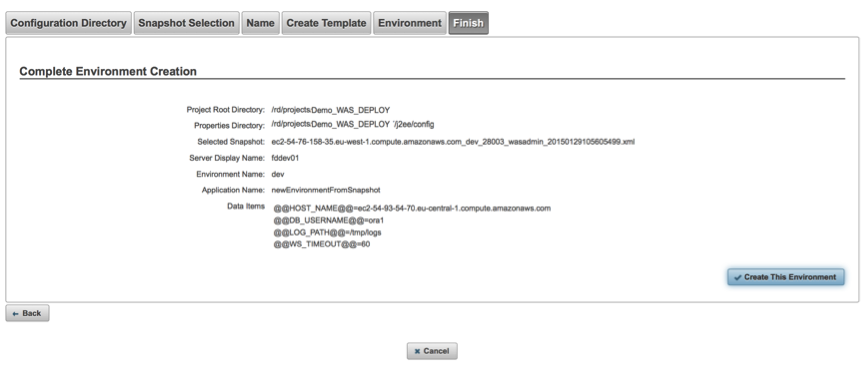
Save. You have now successfully created an installation configuration that will allow you to create a new installation from an existing configuration that was imported into RapidDeploy using the snapshot capability.

